How to Insulate a Stove Pipe?
On this page (7 sections)
You can absolutely insulate a stove pipe to improve efficiency and safety. Proper insulation helps keep smoke and heat moving up the pipe effectively. It also reduces the risk of heat transferring to nearby combustible materials. Insulating your stove pipe is a smart move for any wood-burning stove owner.
When you insulate a stove pipe, you’re essentially creating a barrier. This barrier helps maintain a hotter flue gas temperature. This hotter gas travels more easily. It also means less creosote buildup, which is a major safety concern. Many homeowners find this an important step for their stove’s performance.
- Insulate to boost stove efficiency.
- Helps maintain hotter flue gases.
- Reduces the chance of creosote fires.
- Protects surrounding areas from heat.
- Use materials designed for high heat.
Let’s walk through how to properly insulate your stove pipe step-by-step.
Putting Insulation on Your Stove Pipe: A Step-by-Step Guide
You’re thinking about insulating your stove pipe, and that’s a fantastic idea for both safety and efficiency. Think of it like giving your stove pipe a cozy, fire-resistant blanket. This isn’t just about keeping your home warm; it’s about making sure your stove operates at its best and reduces risks. We’ll walk you through the entire process, making it easy to understand and tackle.
Why Insulate Your Stove Pipe? The Benefits Explained
Insulating your stove pipe offers some really important advantages. It helps maintain higher flue gas temperatures. This means your stove can burn wood more completely and efficiently. When flue gases stay hot, they move up the chimney more easily. This is also key in preventing creosote buildup, which is a major fire hazard. Many experts agree that proper insulation contributes significantly to a safer heating system (National Fire Protection Association). Many experts agree that proper insulation contributes significantly to a safer heating system.
Beyond efficiency, insulation acts as a protective shield. It keeps the intense heat from the exhaust gases from reaching nearby combustible materials like wood framing or drywall. This greatly reduces the risk of a house fire. When you look at the data, chimney fires are a serious concern, and proper installation, including insulation, is a primary defense. Your home’s safety is always worth investing in.
Understanding the Types of Stove Pipe Insulation
Not all insulation is created equal, especially when it comes to the extreme temperatures of a stove pipe. You need materials specifically designed for this purpose. The most common and effective type is double-wall pipe with an air gap or insulation built right in. This is often called Class A chimney pipe or insulated chimney pipe. You can also find specialized insulation wraps designed to go around single-wall stove pipe.
Double-Wall Insulated Pipe
This is the preferred method for new installations or when replacing sections of pipe. It consists of two layers of metal with either an air space or a layer of high-temperature ceramic insulation between them. This design keeps the outer surface cooler. It also helps maintain the flue gas temperature inside. You’ll find it in various diameters and configurations to fit your stove and chimney system.
Insulation Wraps for Existing Pipe
If you have existing single-wall stove pipe and want to add insulation, you can use specialized high-temperature insulation wraps. These are typically made of fiberglass or ceramic wool and are encased in a stainless steel or metal jacket. You’ll wrap these around your existing pipe. Ensure the wrap is rated for the temperatures involved. Using the wrong type can be ineffective or even dangerous.
Essential Materials and Tools You’ll Need
Before you start, gather everything you need. Having all your supplies ready makes the job go much smoother. You don’t want to be halfway through and realize you’re missing a key piece. This list will help ensure you’re well-prepared.
- Appropriate Stove Pipe: Double-wall insulated pipe or single-wall pipe plus high-temperature insulation wrap.
- Pipe Sections and Elbows: As needed for your setup.
- Wall Straps and Ceiling Supports: To securely fasten the pipe.
- High-Temperature Sealant: For sealing joints.
- Screwdriver or Nut Driver: To secure pipe sections with sheet metal screws.
- Measuring Tape: For accurate cuts and placement.
- Safety Gear: Heat-resistant gloves, safety glasses, and a dust mask.
- Cleaning Supplies: Rags and perhaps a brush to clean surfaces.
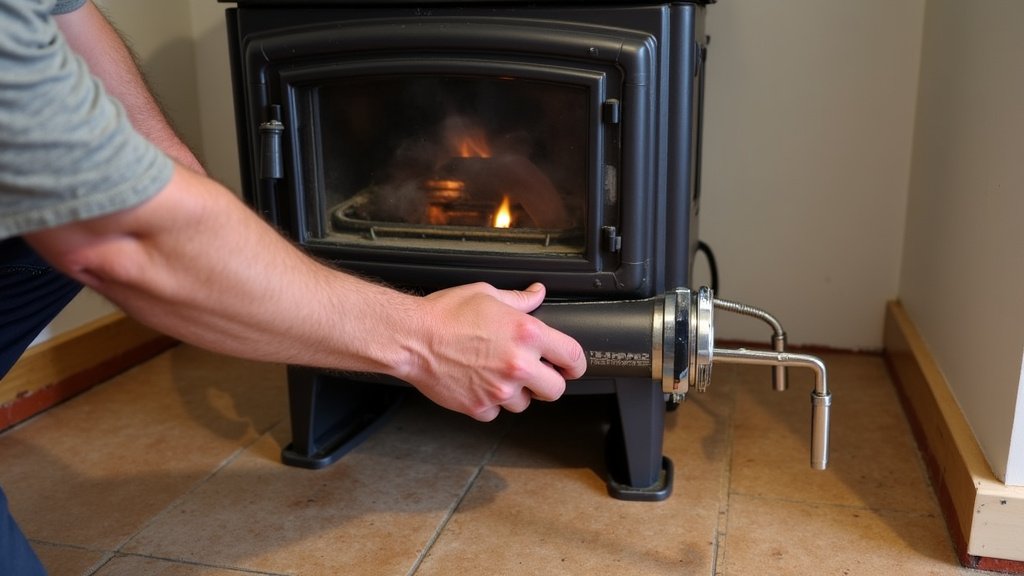
Step-by-Step: Insulating Your Stove Pipe
Now let’s get down to business. We’ll break down the process into manageable steps. Remember, patience and attention to detail are your best friends here. Safety first, always!
Step 1: Planning Your Layout and Measuring
First, figure out exactly how your stove pipe needs to run. It should go up as vertically as possible. Horizontal runs should be kept to a minimum, generally no more than 25% of the total vertical run. Ensure it has a continuous upward slope. Measure the distances carefully. You’ll need to know the lengths of pipe and the angles for any elbows required.
Step 3: Assembling and Connecting the Pipe Sections
Start connecting your pipe sections. If you’re using double-wall pipe, the sections usually have a male end and a female end. The male end (crimped) should always go down into the female end (uncrimped) of the section below it. This ensures that any condensation or creosote flows back into the stove, not out between the joints. Secure each joint with at least two sheet metal screws, spaced about 12 inches apart. This is vital for a secure connection.
Securing the Joints
Use self-tapping screws specifically designed for sheet metal. These screws pierce the metal easily. Make sure they are long enough to go through both layers of pipe where applicable. For double-wall pipe, screw through both the inner and outer walls at the joint. This creates a sturdy, sealed connection. Always check the manufacturer’s instructions for their specific recommendations on screw placement and type.
Step 4: Sealing the Connections
Once the screws are in, it’s time to seal the joints. Use a high-temperature stove pipe sealant. Apply a bead of sealant around the connection where the male end inserts into the female end. This creates an extra barrier against smoke and creosote leaks. Wipe away any excess sealant with a damp cloth. Let it cure according to the product instructions before using the stove.
Step 5: Installing Wall Straps and Ceiling Supports
Proper support is critical for safety. The stove pipe needs to be securely fastened to the wall or ceiling joists. Use wall straps to support horizontal runs and ceiling supports for vertical runs passing through floors or ceilings. These supports keep the pipe from sagging and prevent excessive movement. Ensure they are installed according to the manufacturer’s guidelines and local building codes.
Maintaining Clearance to Combustibles
This is perhaps the most critical safety aspect. You absolutely must maintain the correct clearance between the stove pipe and any combustible materials. Double-wall insulated pipe typically requires a much smaller clearance than single-wall pipe. Always refer to the manufacturer’s installation manual and your local building codes for the exact required clearances. These distances are not suggestions; they are life-saving requirements.
Step 6: Testing for Leaks
After everything is installed and the sealant has cured, it’s time for a test. Light a small, controlled fire in your stove. While the fire is burning, carefully inspect all the pipe joints and connections. Look and feel for any signs of smoke or soot escaping. You can also use a smoke emitter or even a flashlight held at an angle to spot any tiny leaks. If you find any, shut down the stove, let it cool, and re-seal the offending joints.
A Quick Checklist for Your Stove Pipe Insulation Project
Did you cover all your bases? Here’s a quick checklist to help you confirm:
- Correct type of insulated pipe or wrap used?
- All joints securely screwed together?
- All joints properly sealed with high-temp sealant?
- Minimum clearances to combustibles maintained?
- Pipe adequately supported with straps/hangers?
- Tested for leaks after installation?
Conclusion
You’ve now got a solid plan for insulating your stove pipe. Remember, this step is key to a safer and more efficient heating system. By properly insulating, you’re reducing fire risks and helping your stove burn wood effectively. Take your time with the installation and double-check all clearances and connections. You’ve invested in your home’s comfort and safety. If you’re feeling confident, go ahead and get started on your project. If not, consider calling a professional chimney sweep to ensure everything is installed to code.
Frequently Asked Questions
How do I know if I have single-wall or double-wall stove pipe?
Single-wall pipe looks like a basic metal tube. Double-wall pipe will have two layers of metal with a gap or insulation between them. You might see a seam running along the length where the two walls are joined. If you’re unsure, it’s always best to consult the manufacturer’s documentation or a professional.
Can I use regular home insulation around my stove pipe?
No, you absolutely should not use regular home insulation like fiberglass batts or spray foam. These materials are not designed to withstand the extreme temperatures of stove pipe and can easily catch fire, creating a serious hazard. Always use materials specifically rated for high heat and stove pipe applications.
What kind of screws should I use to connect stove pipe sections?
You should use self-tapping sheet metal screws. These screws are designed to easily pierce the metal of the stove pipe and create a secure connection. Most manufacturers recommend using at least two screws per joint, spaced about 12 inches apart, to ensure a tight seal.
How much clearance do I need between insulated pipe and walls?
The required clearance depends heavily on the type of insulated pipe you’re using. Double-wall insulated pipe (Class A) typically requires much less clearance than single-wall pipe. Always consult the manufacturer’s installation manual for the specific pipe you are using. Local building codes also dictate minimum clearances, so check those as well.
How often should I check my stove pipe insulation for damage?
It’s a good idea to inspect your stove pipe and its insulation at least once a year, typically before the heating season begins. Look for any signs of damage, rust, loose joints, or deteriorating insulation. A yearly professional chimney sweep will also include this inspection as part of their service.