How to Install a Stove Pipe Thimble?
On this page (7 sections)
Installing a stove pipe thimble is your key to safely connecting your wood stove to your chimney. A properly installed thimble ensures fire safety by creating a proper barrier. We’ll walk you through this essential step for your wood stove setup.
This device is more than just a connector. It’s a critical safety component that prevents heat from damaging your walls or ceiling. Understanding how to install it correctly is vital for any homeowner with a wood-burning stove and its proper installation is a major part of fire prevention.
- A stove pipe thimble creates a safe connection.
- It protects your home from chimney heat.
- Proper installation is essential for fire safety.
- This guide will show you the steps involved.
Let’s walk through exactly how to install a stove pipe thimble, step by step, so you can enjoy your cozy fire with peace of mind.
Installing Your Stove Pipe Thimble Safely
A stove pipe thimble is your first line of defense. It’s the part that connects your wood stove pipe to a wall or ceiling. This connection needs to be fire-safe. You’re essentially creating a passage for heat. We want to make sure that heat stays where it belongs. Installing it correctly is not just a recommendation; it’s a safety requirement.
We understand that DIY projects can seem daunting. But when it comes to fire safety, taking the time to learn is worth its weight in gold. Think of it like this: your wood stove is a cozy heart for your home. The stove pipe is its lifeline. The thimble is the gatekeeper, ensuring that life-giving heat doesn’t become a destructive force.
This guide will walk you through the process. We’ll break down each step. You’ll learn what tools you need. You’ll understand the different types of thimbles. We’ll cover the measurements and the installation itself. By the end, you’ll feel confident in your ability to install this essential component correctly.
Understanding Your Stove Pipe Thimble Options
Before you start screwing things in, let’s talk about the different kinds of thimbles available. Your choice will depend on where you’re installing it and your local building codes. Many experts recommend checking with your local fire department or building inspector first. They can offer specific guidance for your area (National Fire Protection Association).
Wall Thimbles
Wall thimbles are designed for passing stove pipe through a vertical wall. They create a safe space between the hot pipe and the combustible wall materials. These typically consist of a metal sleeve. There are usually inner and outer plates. These plates help maintain the required clearance. You’ll often see them made of stainless steel. This material is chosen for its durability and heat resistance.
Ceiling or Roof Thimbles
Ceiling or roof thimbles are for when you need to pass the pipe through a horizontal ceiling or the roof. These are often more substantial than wall thimbles. They have to support the weight of the chimney pipe above. They also need to create a significant fire barrier. These are sometimes called “stove pipe supports” or “roof jacks.” Always ensure you get the correct type for your specific application. A wall thimble is not a substitute for a ceiling thimble.
Insulated vs. Non-Insulated Thimbles
Some thimbles are insulated. These offer an extra layer of protection. They use materials like ceramic fiber to keep heat away from surrounding structures. Non-insulated thimbles rely solely on air space for clearance. The required clearance distances will vary depending on the type of thimble and the wall or ceiling material (U.S. Fire Administration). Always follow the manufacturer’s instructions and local codes.
Gathering Your Tools and Materials
Having the right tools makes the job much easier. It also helps ensure you do it correctly the first time. Think of it as preparing your workspace. A well-prepared station means a smoother installation process.
Essential Tools You’ll Need
You’ll want to have these on hand:
- Tape measure: For precise measurements.
- Pencil or marker: To mark your cutting lines.
- Drill with bits: For pilot holes and screws.
- Screwdriver or screw gun: To secure the thimble.
- Safety glasses: Protect your eyes from dust and debris.
- Work gloves: To protect your hands.
- Stud finder: To locate wall studs.
- Level: To ensure your installation is straight.
- Drywall saw or reciprocating saw: For cutting openings in walls or ceilings.
- Caulking gun and high-temperature caulk: For sealing gaps.
Key Materials to Have Ready
Besides the thimble itself, make sure you have:
- Your chosen stove pipe thimble.
- Appropriate screws for mounting.
- High-temperature sealant or caulk.
- Wall or ceiling material if you’re doing new construction or repair.
- Wood blocking if required by code or manufacturer instructions.
Step-by-Step: Installing a Stove Pipe Thimble
Now, let’s get down to business. We’ll guide you through the installation step-by-step. Remember, safety is paramount throughout this process. Always refer to the specific instructions that came with your thimble. Manufacturer guidelines are vital.
Step 1: Determine Placement and Clearance
This is arguably the most important step. You need to figure out exactly where the thimble will go. You must maintain the required clearance from any combustible materials. This distance is usually spelled out in the stove and thimble manuals. It’s also a key part of building codes. Many codes require 18 inches of clearance, but this can be reduced with specific protection methods (National Fire Protection Association).
Use your tape measure and stud finder. If you’re installing through a wall, locate the studs. You want to avoid cutting into them if possible. If you must cut near a stud, you might need to add extra bracing or blocking. Ensure the location makes sense for the stove pipe run. The pipe should ideally be as straight as possible.
Step 2: Mark the Opening
Once you’ve confirmed your placement and clearances, it’s time to mark. Hold the thimble against the wall or ceiling. Trace around the outer edge of the thimble’s mounting plate. This line indicates where you’ll need to cut. Double-check your measurements. A little extra care here saves a lot of headaches later.
Step 3: Cut the Opening
Put on your safety glasses and gloves. Carefully use your drywall saw or reciprocating saw to cut along the marked line. Go slowly. You can always make the hole slightly larger if needed. However, you can’t make it smaller. If you’re cutting through drywall, the dust can be considerable. Consider covering nearby furniture.
Step 4: Prepare the Opening and Install Blocking (If Needed)
Clear away any loose debris from the opening. Now, inspect the surrounding area. If your installation requires it, you’ll need to add fire-rated blocking. This is often a piece of non-combustible material like cement board or metal framing. It creates a solid surface to attach the thimble. For ceiling installations, this blocking is essential to support the weight.
Follow manufacturer instructions or local codes for the size and type of blocking. This step ensures the thimble is securely mounted. It also helps maintain the critical clearance around the opening. If your wall or ceiling material is combustible, you might need to line the opening with a fire-rated material before installing the thimble.
Step 5: Mount the Stove Pipe Thimble
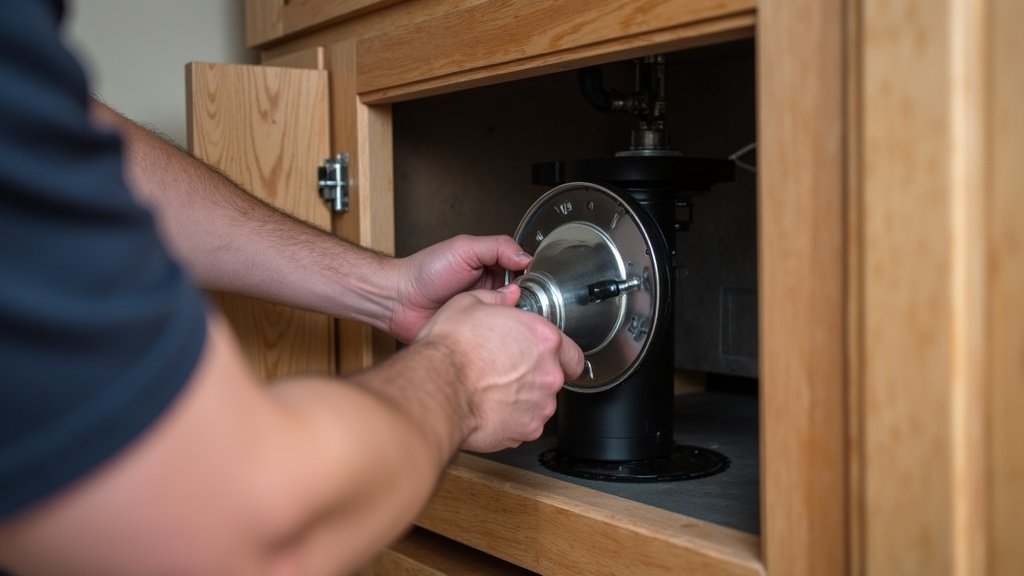
Position the thimble in the opening. Ensure it is centered and flush with the surface. Use your drill to create pilot holes. Then, use your screws to securely fasten the thimble in place. Make sure it’s level and snug. The mounting screws should be appropriate for the material you are fastening into.
If your thimble has a decorative flange or trim piece, attach that now. This often covers the edges of the opening and provides a clean finish. For ceiling thimbles, ensure any required support brackets or collars are also installed.
Step 6: Seal the Edges
Use your caulk gun to apply a bead of high-temperature sealant around the outer edge of the thimble’s mounting plate. This seals any small gaps. It prevents air leaks and keeps smoke or carbon monoxide from escaping into your home. Be sure to use sealant rated for high temperatures. Regular caulk will not withstand the heat from the stove pipe.
Step 7: Connect Your Stove Pipe
Now, you can connect your stove pipe to the thimble. Ensure the pipe slides into the thimble correctly. Most thimbles are designed to receive the stove pipe. The connection should be snug. You may need to use screws to secure the pipe to the thimble. Always check the manufacturer’s instructions for the proper connection method. Some systems require a specific adapter or collar.
Key Considerations for a Successful Installation
Beyond the basic steps, a few extra points can make a big difference. Thinking about these details now can save you trouble down the road.
Maintaining Proper Clearance is Non-Negotiable
We’ve said it before, but it bears repeating. Clearance is king. Different stove pipes, stoves, and thimbles have different clearance requirements. For example, single-wall stove pipe typically requires more clearance than double-wall pipe. Always consult the manuals for all components. Many experts stress that inadequate clearance is a leading cause of house fires related to wood stoves (Consumer Product Safety Commission).
A common misconception is that if the pipe doesn’t feel hot, it’s fine. That’s not accurate. Surfaces can reach ignition temperatures long before they feel hot to the touch. Measure precisely. When in doubt, add more clearance. It’s better to have a little extra space than not enough.
Local Building Codes Matter
Building codes are in place for a reason. They are designed to protect you and your home. Codes vary by state, county, and even city. What is acceptable in one area might not be in another. Always check with your local building department or fire marshal before you begin. They can provide you with the specific codes that apply to your installation. Some areas may require permits and inspections. Failing to comply can lead to fines or the requirement to redo the work.
Using the Right Type of Pipe and Thimble
Not all stove pipe is created equal. You’ll find single-wall, double-wall, and triple-wall options. Single-wall pipe is generally used for stove-to-thimble connections inside the room. Double-wall or insulated pipe is often used for passing through ceilings or walls. The thimble must be compatible with the type of pipe you are using. Using the wrong combination can compromise safety and efficiency.
Checklist for Your Thimble Installation
Before you start, run through this quick checklist:
- Have you identified the correct type of thimble for your wall/ceiling?
- Are you clear on the required clearance distances from combustibles?
- Do you have all the necessary tools and materials gathered?
- Have you checked your local building codes and obtained any necessary permits?
- Are you prepared to follow the manufacturer’s instructions precisely?
- Will you have a helper if needed for holding parts or cutting?
Conclusion
You’ve learned that installing a stove pipe thimble is a vital step for safe wood stove operation. Understanding the different thimble types and gathering your tools are key. Following the step-by-step installation, from marking to sealing, ensures a secure connection. Remember, maintaining proper clearance and checking local codes are non-negotiable for fire prevention. Now that you have the knowledge, take the next step to complete your installation with confidence. Your peace of mind, and the safety of your home, depends on it.
Frequently Asked Questions
How close can stove pipe be to combustible materials?
The required clearance distance is usually stated in your stove and thimble manuals. It’s often around 18 inches, but this can change based on specific wall protection. Always check your manufacturer’s instructions and local fire codes to be sure.
What happens if I don’t use a thimble?
Not using a thimble means the hot stove pipe is directly exposed to your wall or ceiling. This is a serious fire hazard because it can easily ignite combustible materials. A thimble creates a safe barrier and air gap to prevent this.
Can I use a wall thimble for a ceiling installation?
No, you should not. Wall thimbles and ceiling thimbles are designed for different purposes and support different loads. A ceiling thimble is built to support the weight of the chimney pipe above and provide adequate fire protection through a horizontal surface.
Do I need a permit to install a stove pipe thimble?
Many areas require a permit for wood stove installations and any work affecting your chimney system. It’s best to contact your local building department or fire marshal before you start. They will inform you about permit requirements and inspection schedules.
How do I ensure the stove pipe is securely connected to the thimble?
Most stove pipes slide into the thimble for a snug fit. Manufacturers often recommend securing the connection with screws. Always refer to your stove pipe and thimble manuals for the specific method recommended for your system.