
How to Build a Fire Pit?
To safely build a fire pit, you need to first plan your layout, gather your materials, and assemble the base and walls. This process involves ensuring proper drainage, choosing fire-safe materials, and securing each layer. It’s a fun DIY project that adds warmth and ambiance to your backyard.
Creating your own fire pit can seem like a big undertaking, but it’s more straightforward than you think. We’ve found that with a little preparation and the right tools, most homeowners can build a safe and enjoyable fire pit. You’ll soon be relaxing next to your custom-built backyard feature.
- Proper planning is key.
- Safety comes first, always.
- Gather the right tools and materials.
- Assembly involves simple, repetitive steps.
- Enjoy endless nights by your new fire pit.
Ready to get started? Let’s walk through exactly how to build a fire pit, step by step, so you can enjoy cozy evenings outdoors.
Crafting Your Own Fire Pit
Building a fire pit can be one of the most rewarding DIY projects for your backyard. It’s a chance to create a beautiful focal point and a cozy gathering spot. But before you pick up a single tool, planning is essential. We found that a little foresight goes a long way in ensuring your project is both safe and enjoyable.
Strategic Location and Safety First
Where will your fire pit go? This isn’t just about aesthetics; it’s about safety. Many experts recommend placing your fire pit at least 10 to 25 feet away from any structure or combustible materials. This includes your home, wooden fences, trees, and low-hanging branches. Think about wind direction, too. You don’t want smoke constantly blowing into your living space or your neighbors’ yards.
Checking Local Codes and Regulations
Before you even dig a single shovel-full, check with your local municipality or homeowner’s association. We found that regulations for fire pits can vary widely by location. Some areas have strict rules about size, proximity to property lines, and even what type of fuel you can burn. A quick call to your local fire department or planning office can save you a lot of hassle later on.
Designing Your Fire Pit: Materials and Dimensions
There are many ways to build a fire pit, but most involve a few key components. You’ll need an outer wall, often made of concrete blocks or natural stone, and an inner fire ring, usually metal. The size depends on your space and needs. A common size is 3 to 4 feet in diameter. This allows for a good fire while keeping people at a safe distance.
Material Choices for Durability and Aesthetics
When selecting materials, prioritize fire-resistant options. Concrete retaining wall blocks are popular because they are durable and relatively easy to stack. Natural stone, like granite or limestone, offers a more rustic look but can be heavier and harder to work with. For the inner ring, we recommend a pre-made steel fire pit ring. These help contain the flames and prevent damage to your outer wall materials.
| Material Type | Pros | Cons |
|---|---|---|
| Concrete Retaining Blocks | Affordable, easy to install, uniform look, durable. | Can crack if directly exposed to very high heat without a liner. |
| Natural Stone (e.g., Granite, Limestone) | Beautiful, natural look, very durable, unique. | More expensive, irregular shapes can be challenging to stack, heavy. |
| Fire Bricks | Withstand extremely high temperatures, perfect for inner lining. | Relatively expensive, smaller pieces mean more mortar work. |
| Steel Fire Pit Liner | Essential for heat protection, easy to install, durable. | Adds to the overall cost, must be sized correctly. |
Gathering Your Supplies and Tools
Once you have your design and materials chosen, it’s time to gather everything. There’s nothing worse than starting a project only to realize you’re missing a crucial tool. We find it’s helpful to create a checklist before you begin. This ensures you have all your ducks in a row.
Essential Tools for Construction
- Shovel and Rake: For clearing and leveling the ground.
- Measuring Tape: Precision is key for a round or square pit.
- Level: To ensure your base and wall layers are even.
- Rubber Mallet: For gently tapping blocks into place.
- Trowel and Mortar Mixer (if using mortar): For stone or brick construction.
- Safety Glasses and Work Gloves: Always protect your eyes and hands.
- Wheelbarrow: For moving dirt, gravel, or blocks.
Material Checklist
Here’s a basic list of materials you might need for a typical block or stone fire pit:
- Concrete retaining wall blocks or natural stones
- Steel fire pit ring/liner
- Paver base or gravel (for drainage)
- Coarse sand (for leveling)
- Construction adhesive (for securing blocks) or mortar (for stone/brick)
- Landscaping fabric (optional, for weed control)
- Crushed rock or pea gravel (for the interior base)
Building the Foundation and Base
A strong foundation is crucial for any fire pit. This isn’t just about stability; it’s also about proper drainage. No one wants a soggy fire pit after a rain shower. We’ve learned that taking the time to prepare the base properly pays off in the long run.
Marking Out the Area
First, mark the outline of your fire pit. For a round pit, you can use a string and a stake to draw a perfect circle. For a square or rectangular pit, stakes and string can help you create straight lines and right angles. Remember to account for the thickness of your blocks or stones plus any gaps.
Excavating and Leveling the Ground
Dig down about 6-8 inches within your marked area. Remove any grass, roots, or large rocks. Once excavated, compact the soil at the bottom of your pit. We’ve found that a hand tamper works well for this. Then, add a layer of paver base or gravel, about 4 inches deep. This creates your drainage layer. Rake it smooth and compact it thoroughly. Finally, add a thin layer of coarse sand on top, level it precisely, and mist it lightly with water. This prepared base will give your blocks a solid, level footing. Your fire pit will thank you later!
Constructing the Fire Pit Walls
Now for the fun part: seeing your fire pit take shape! This step involves stacking your chosen materials to form the outer wall. It’s a bit like building with giant, heavy LEGOs, but with much more care.
Laying the First Course of Blocks
Start with your first layer of blocks or stones directly onto your leveled sand base. Place them tightly together, forming a perfect circle or square. Use your level frequently to ensure each block is perfectly horizontal and level with its neighbors. A rubber mallet can help you tap them gently into place. This first course is the most important; if it’s off, all subsequent layers will be too.
Adding Subsequent Layers and Securing Them
Once your first course is down, begin laying the second course. Here’s a pro tip: stagger the joints. This means you want the vertical seams of your second layer to sit in the middle of the blocks below them. This interlocked pattern creates a much stronger structure. Apply a bead of construction adhesive to the top of each block before placing the next layer, or use mortar if you’ve chosen that method. Continue stacking until your fire pit reaches the desired height, typically 12-18 inches (2-3 courses). Remember to check for level periodically. You want a fire pit that stands tall and proud.
Installing the Fire Ring and Finishing Touches
With your walls built, the final steps involve adding the inner fire ring and ensuring proper airflow and drainage. This prepares your fire pit for its primary purpose: holding a beautiful, crackling fire.
Placing the Steel Fire Ring
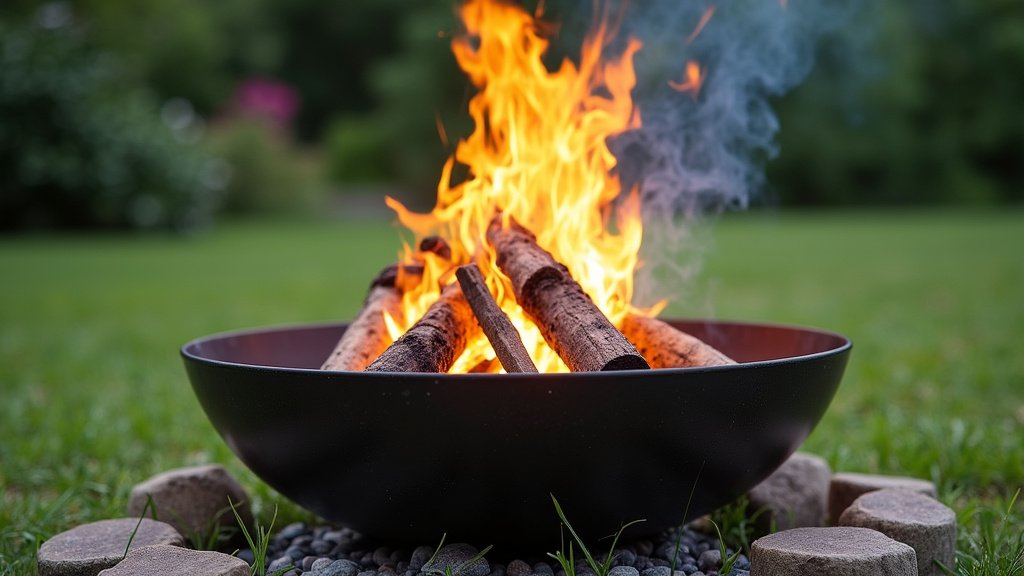
Carefully lower your steel fire pit ring into the center of your constructed walls. It should fit snugly, leaving a small gap – perhaps 1 to 2 inches – between the ring and the inner face of your block walls. This gap serves a crucial purpose: it allows for an air insulation layer, protecting your outer blocks from the intense heat of the fire. The ring should sit slightly below the top of your outer wall, creating a clean, finished look.
Adding Drainage and Interior Fill
Once the fire ring is in place, fill the bottom inside the ring with a layer of coarse gravel or crushed rock, about 4-6 inches deep. This provides further drainage for rainwater and helps elevate your fire, improving airflow. We’ve found that good airflow is vital for a strong, clean-burning fire. If you plan to add a removable grate, make sure the gravel level allows for it.
Conclusion
You’ve seen that building your own backyard fire pit is an achievable and rewarding DIY project. By focusing on smart planning, choosing the right fire-safe materials, and carefully building your foundation and walls, you’re setting yourself up for success. We’ve shown you that attention to detail, especially in leveling and securing each course, ensures a stable and long-lasting fire pit. Now, it’s time to gather your tools, roll up your sleeves, and get ready to enjoy countless evenings gathered around the warmth of your custom creation.
Frequently Asked Questions
How long does it typically take to build a DIY fire pit?
Most DIY fire pit projects can be completed in a single weekend. We’ve found that preparation, like gathering materials and checking local codes, often takes as much time as the actual construction. Once you start building, it’s usually just a few hours of work.
Can I use regular landscaping blocks for my fire pit?
While landscaping blocks are common, we recommend using blocks specifically rated for high heat or adding a steel fire ring. Regular landscaping blocks can crack or degrade over time when exposed directly to intense fire temperatures. A steel liner provides crucial protection.
What’s the best way to ensure proper drainage for a fire pit?
Proper drainage starts with a well-prepared base. We suggest excavating 6-8 inches and filling it with compacted gravel or paver base. This allows water to seep away efficiently, preventing your fire pit from turning into a puddle after rain.
Do I need to cement or mortar my fire pit blocks together?
For most DIY block fire pits, construction adhesive is sufficient for securing the layers. However, if you’re using natural stone or fire bricks, mortar provides a more traditional and durable bond. Always check the adhesive’s heat rating.
How far from my house should I build a fire pit?
Safety is paramount, and local codes vary, but we consistently see recommendations for fire pits to be at least 10 to 25 feet away from any structures or combustible materials. This distance helps prevent stray sparks from causing damage.