How to Install an Electric Fireplace Insert?
On this page (3 sections)
Installing an electric fireplace insert is a straightforward DIY project you can do yourself. You can typically install one in just a few hours with basic tools. It’s a fantastic way to add warmth and ambiance to any room without the hassle of a traditional fireplace. This guide will walk you through the simple steps to get your new electric fireplace up and running.
Electric fireplace inserts are designed for easy installation. They are a popular choice for homeowners looking for a convenient and safe heating solution. Many models come pre-assembled, requiring minimal assembly. You’ll be enjoying cozy evenings by the fire before you know it!
- Gather your tools and clear the installation area.
- Prepare the existing fireplace opening or designated space.
- Slide the electric fireplace insert into place.
- Connect the power cord and test the unit.
- Add decorative elements if desired.
Ready to transform your living space? Let’s walk through exactly how to install your new electric fireplace insert, step by step. If you’re looking for a more general guide, learn how to install a fireplace insert.
Setting Up Your Electric Fireplace Insert Installation
You’re ready to bring cozy warmth to your home. Installing an electric fireplace insert is a manageable DIY task. It can dramatically change the feel of a room. This guide breaks down the process. We’ll help you get your new fireplace insert working safely and beautifully. Many homeowners find this project quite satisfying. You’ll soon be enjoying the ambiance. Let’s get started with what you’ll need.
Gathering Your Tools and Supplies
Before you begin, having all your tools ready makes the job go smoothly. You don’t want to stop halfway through to find a missing screwdriver. This is true for most home improvement projects. Having everything on hand is key to efficiency. Here’s a list of common items you’ll likely need:
- Safety glasses and gloves
- Screwdriver set (Phillips and flathead)
- Level
- Measuring tape
- Utility knife or box cutter
- Vacuum cleaner or shop vac
- Cleaning cloths
- Potentially a drill and appropriate bits (check your insert’s manual)
- Your electric fireplace insert and all its parts
Always consult your specific fireplace insert manual. It will have the most accurate list of requirements. Some models might need specialized tools. Safety first is always the best policy. So, put on those safety glasses and gloves!
Preparing the Fireplace Opening or Space
The first real step is to make sure your chosen spot is ready. This usually means preparing an existing fireplace opening. It could also be a custom-built nook in your wall. You need a clean and secure location. A messy space can lead to installation problems.
Clearing Out an Existing Fireplace
If you have an old, unused fireplace, you’ll need to clean it. Remove any debris like old ash, soot, or loose bricks. A thorough cleaning prevents dust from going everywhere. It also ensures a snug fit for your new insert. Use a vacuum or shop vac for this. Getting into all the nooks and crannies is important. You want a clean and stable base for the insert.
Preparing a New Space
If you’re installing into a wall that doesn’t have a fireplace, you’ll need to build a space. This might involve framing out an opening. You’ll need to follow the dimensions recommended by the insert manufacturer. Ensure the framing is sturdy and level. This is a more involved step. It might require basic carpentry skills. If you’re unsure, consider consulting a contractor for this part. A properly built opening is essential for safety and appearance.
Inspecting and Preparing the Insert
Once your space is ready, it’s time to focus on the insert itself. Most electric fireplace inserts come with minimal assembly required. Carefully unpack the unit. Remove all packaging materials. Check for any visible damage that might have occurred during shipping. This is a good time to read through the owner’s manual again.
Unpacking and Initial Check
Lay out all the components. You should have the main fireplace unit, any decorative trim pieces, and hardware. Many units come with a pre-attached power cord. Verify that everything listed in the manual is present. If anything is missing or damaged, contact the retailer or manufacturer immediately. Don’t try to force a damaged part. You want everything to be in perfect working order.
Checking Power Requirements
Understand your insert’s power needs. Most electric fireplaces plug into a standard outlet. Some higher-wattage models might require a dedicated circuit. Check the manual for voltage and amperage requirements. Make sure the outlet you plan to use is suitable. If you need to install a new outlet or upgrade your electrical system, you’ll need a qualified electrician. Attempting to power a unit with an inadequate electrical supply can be dangerous. It could also damage the fireplace. Safety guidelines from electrical safety organizations often stress using properly rated circuits (National Fire Protection Association).
Installing the Electric Fireplace Insert
Now for the main event! This is where your fireplace starts to take shape. The process is typically straightforward, designed for homeowners.
Positioning the Insert
Carefully lift the electric fireplace insert. You might need a second person for this, as they can be heavy. Gently slide the unit into the prepared opening. Make sure it’s centered and level. Use your level to check it from side to side and from top to bottom. A level insert looks better and functions correctly. It also ensures the doors, if any, operate smoothly.
Securing the Insert (If Necessary)
Some inserts have mounting brackets or screws to secure them in place. Others are designed to simply rest in the opening, held by their weight and fit. Your manual will specify if any securing steps are needed. If screws are involved, use the appropriate drill bit and drive them carefully. Don’t overtighten. You don’t want to damage the unit or the surrounding material. A secure installation is important for safety.
Attaching Decorative Trim or Surrounds
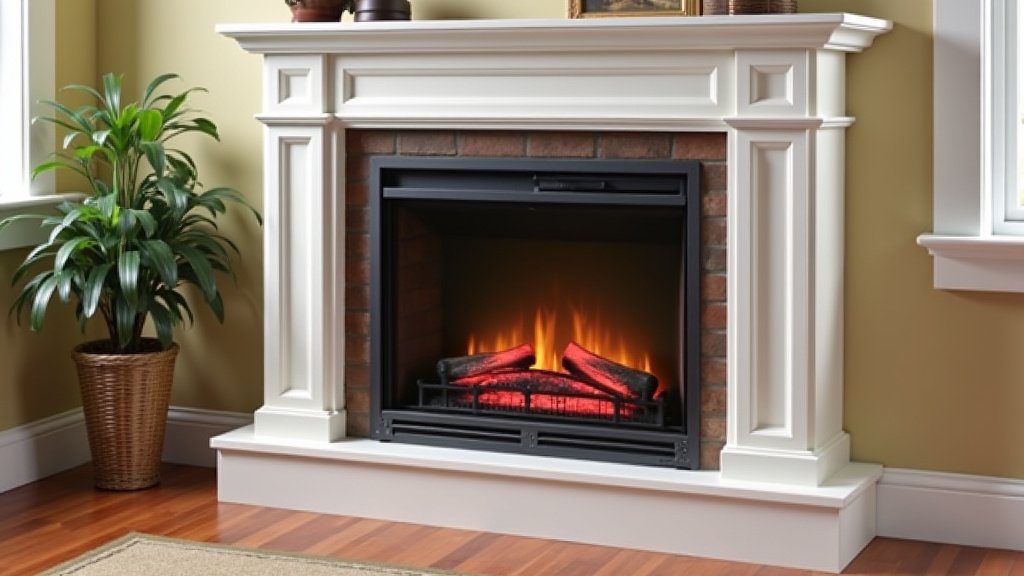
Many electric fireplace inserts come with a decorative surround or trim kit. Follow our guide to install a fireplace surround for more detail. This hides the gap between the insert and the fireplace opening or wall. These pieces usually attach easily. They might snap into place or be secured with small screws. Follow the instructions specific to your model. This step really finishes the look. It makes your new fireplace look like a built-in feature.
Connecting Power and Testing
With the insert physically in place, it’s time to bring it to life. This is an exciting moment! You’re almost there.
Plugging In the Power Cord
Locate the power cord. It’s usually on the back or side of the unit. Route the cord neatly. Avoid pinching it between the insert and the wall. Plug it into the designated outlet. Ensure the plug is fully seated. If the cord doesn’t reach, you might need an extension cord, but only if it’s a heavy-duty, properly rated one. However, many experts recommend avoiding extension cords for fixed appliances like fireplaces whenever possible. It’s always best to have an outlet located conveniently near the insert.
Initial Power-Up and Testing Functions
Turn on the power to the outlet if it’s on a switch. Then, use the controls on the fireplace insert to turn it on. Most units have a remote control and/or control buttons on the unit itself. Test the heat settings. Start with the lowest setting to see how it performs. Test the flame effect. Adjust the brightness and color if your model allows. Ensure all functions are working as expected. Listen for any unusual noises. A happy fireplace makes a gentle hum, not a loud grinding sound.
Final Touches and Enjoyment
Your electric fireplace insert should now be fully installed and operational. You’re just a few small steps away from enjoying your new focal point.
Adding Decorative Media (If Applicable)
Some electric fireplaces come with decorative logs, crystals, or stones. These are often placed in front of the heating element. Your manual will show you the correct way to arrange these. Be careful not to block any vents. Proper airflow is critical for the unit’s function and longevity. These media pieces add to the realism of the flame effect. They enhance the overall ambiance you’re trying to create.
Troubleshooting Common Issues
What if it doesn’t work perfectly right away? Don’t panic! Many issues are simple fixes.
- No Power: Double-check that it’s plugged in securely. Ensure the outlet has power by testing it with another device. Check your circuit breaker.
- No Heat: Make sure the heat function is turned on. Some models have safety cut-offs if they overheat. Ensure vents aren’t blocked. Let it cool down and try again.
- Flame Effect Not Working: Verify that the flame effect is selected. Check if brightness controls are turned up.
Your New Cozy Space Checklist
To make sure you haven’t missed anything, run through this quick checklist:
- Tools and supplies gathered?
- Installation area cleaned and prepared?
- Insert unpacked and inspected for damage?
- Power requirements understood and outlet checked?
- Insert positioned correctly and leveled?
- Power cord plugged in and unit tested?
Congratulations! You’ve successfully installed your electric fireplace insert. Now it’s time to sit back, relax, and enjoy the warmth and beautiful ambiance you’ve created. You did a great job!
Conclusion
You’ve successfully navigated the steps to install your electric fireplace insert. Remember, careful preparation and attention to detail were key. You’ve transformed a space with a new focal point, adding warmth and charm. Now, take a moment to admire your work. Enjoy the cozy ambiance your new fireplace provides. For ongoing enjoyment, always refer to your owner’s manual for maintenance tips. Your next step is simply to relax and enjoy your beautifully updated room!
Frequently Asked Questions
How long does it typically take to install an electric fireplace insert?
Most homeowners find they can complete the installation in just a few hours. This timeframe includes preparation, the physical placement of the insert, and testing. Having all your tools ready beforehand speeds up the process considerably.
Can I install an electric fireplace insert myself, or do I need a professional?
For most electric fireplace inserts, a DIY installation is perfectly manageable. The steps are straightforward and designed for homeowners. However, if your project involves significant electrical work, like installing a new dedicated circuit, it’s best to consult a qualified electrician.
What’s the difference between an electric fireplace insert and a freestanding unit?
An insert is designed to fit into an existing fireplace opening or a pre-built wall cavity. A freestanding unit, on the other hand, is a self-contained fireplace that can be placed against a wall without needing a special opening. Inserts offer a more integrated look.
Do electric fireplaces require special electrical outlets?
Many standard electric fireplaces plug into a regular 120-volt household outlet. However, some higher-wattage models that produce more heat might require a 240-volt outlet or a dedicated circuit. Always check your insert’s manual for specific power requirements.
What if my electric fireplace insert doesn’t heat properly?
First, double-check that the heat function is turned on and that the thermostat is set to a suitable temperature. Ensure that the air vents on the unit are not blocked by anything, as this can restrict airflow. If the issue persists, consult your owner’s manual for troubleshooting or contact the manufacturer.