How to Install a Fireplace Insert?
On this page (3 sections)
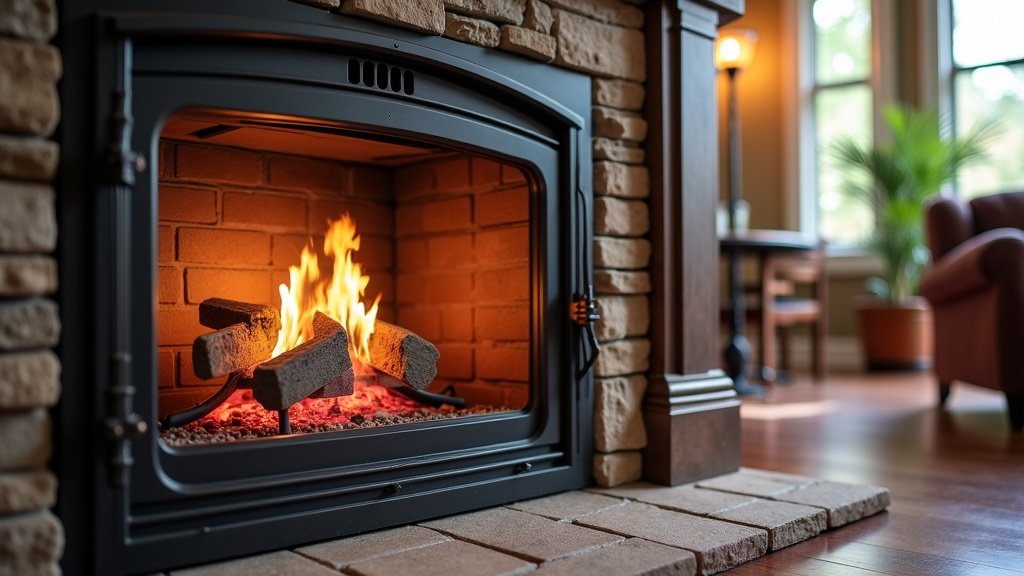
The easiest way to install a fireplace insert is by carefully preparing your existing fireplace, ensuring the chimney is clean, and then properly sealing the insert into the opening. You’ll need to follow the manufacturer’s instructions closely for a safe and efficient installation of your new fireplace insert.
Modern fireplace inserts can drastically improve heating efficiency and reduce energy costs for your home. We found that a proper installation guarantees both safety and optimal performance, transforming your old, inefficient fireplace into a cozy, effective heat source. This update is often a smart investment.
- Gather your essential tools and materials.
- Clean and inspect your existing chimney thoroughly.
- Prepare the fireplace opening for the insert.
- Fit and secure the fireplace insert properly.
- Connect and seal the flue liner system.
- Test for drafts and ensure safe operation.
Ready to update your cozy space? Let’s walk through exactly how to install a fireplace insert, step by step.
Installing Your Fireplace Insert: A Step-by-Step Guide
Are you ready to transform your drafty old fireplace into an efficient heat source? Installing a fireplace insert can make a big difference in both your home’s comfort and your heating bills. We’ll walk you through each vital step to ensure a safe and successful installation.
Gather Your Tools and Materials
Before you get started, having the right equipment is essential. Think of it like cooking a recipe – you need all your ingredients and tools lined up. This preparation saves time and prevents frustration during the installation process.
Essential Tools You’ll Need
You’ll need a variety of tools for this project. Many of these you might already own. Having them ready helps the job go smoothly.
- Heavy-duty work gloves and safety glasses. Your safety is always first.
- Measuring tape and a straightedge. Accuracy is key for a good fit.
- Caulking gun and high-temperature silicone sealant. This is crucial for sealing.
- Drill for fasteners and a screwdriver set. You’ll need these for securing components.
- Tin snips or metal shears. For cutting any metal components as needed.
- Wire brush and vacuum cleaner (shop-vac). Absolutely necessary for cleaning.
- Flashlight or work light. Your chimney might be dark inside.
- Pliers and a utility knife. Always handy for miscellaneous tasks.
- Hacksaw or reciprocating saw (if modifications are needed).
Materials to Prepare
Beyond your tools, you’ll need specific materials. Always check your insert’s manual for recommended items. Different inserts can have slightly different requirements.
- Your new fireplace insert. Make sure it’s the correct size for your opening.
- Stainless steel flexible flue liner kit. This is usually sold separately.
- Insulation for the flue liner (optional but recommended for efficiency).
- Top plate, storm collar, and cap for the chimney.
- Fasteners and mounting brackets (often included with the insert).
- Fire-resistant hearth pad (if your existing hearth isn’t sufficient).
We found that organizing your tools and materials before you begin can prevent delays. This makes the entire process feel more manageable. It also helps you avoid unnecessary trips to the hardware store.
Remember, always refer to your specific fireplace insert’s manual for a definitive list of required items. Manufacturer instructions are your best guide.
Chimney Cleaning and Inspection
This step is non-negotiable. Installing an insert into a dirty chimney is a fire hazard. Think of your chimney as the exhaust pipe for your new heating system. It needs to be clean to function safely.
Why a Clean Chimney Matters
Over time, soot and creosote build up in your chimney. These are highly flammable. When you introduce a new, more efficient heat source like an insert, you’re increasing the amount of exhaust. A clean chimney ensures proper draft and significantly reduces the risk of a chimney fire (Chimney Safety Institute of America).
How to Clean Your Chimney
You can clean your chimney yourself, or you might choose to hire a professional. Many homeowners prefer the latter for peace of mind. If you DIY, be prepared for a messy job.
- Wear old clothes, gloves, and a respirator mask.
- Cover the fireplace opening with a tarp or plastic sheeting to contain debris.
- Use a chimney brush sized for your flue. Go from top to bottom (from the roof) or bottom to top (from the fireplace, if accessible).
- Scrub the interior walls thoroughly to remove all creosote and soot.
- Use a shop-vac to clean out the firebox and smoke shelf of all debris.
We have learned that even if you plan to install a liner, a clean chimney is still crucial. It minimizes the risk of old creosote catching fire around the new liner or falling onto the insert.
Inspect for Damage and Obstructions
While you’re cleaning, take this opportunity to inspect your chimney. Look for cracks, missing mortar, or any other signs of damage. Also, make sure there are no animal nests or other obstructions. We understand an intact, clear chimney is safer and performs better.
If you find significant damage, consult a chimney professional before proceeding. They can advise on necessary repairs to ensure structural integrity and safety.
Preparing the Fireplace Opening
Your fireplace opening needs to be just right for the insert. Learn the difference between fireplaces and inserts before planning a project. This isn’t just about slipping it in; it’s about creating a snug, safe fit. An improperly fitted insert can lead to heat loss and potential smoke issues.
Measure Twice, Cut Once
You’re probably tired of hearing this, but it’s true: Measure your fireplace opening carefully. Compare these measurements to the specifications of your insert. Pay attention to height, width, and depth. We find that small discrepancies can cause big headaches later.
Clearing the Fireplace
Remove any existing grates, screens, or other accessories. You want the firebox to be completely empty. Chip away any loose mortar or debris using a chisel and hammer. You’re creating a clean slate for your new installation.
If your hearth extends beyond the firebox, great! If not, ensure it meets the minimum requirements as stated in your insert’s manual. Many experts say a non-combustible hearth extension should be at least 16 inches deep (National Fire Protection Association).
Leveling and Sealing
The insert needs a level surface to rest on. Use shims if necessary to create a flat, stable base. Then, seal any large gaps or cracks in the firebox with refractory cement. This helps prevent air leaks and improves heat efficiency. Think of it as plugging up holes in a leaky bucket.
Installing the Fireplace Insert and Flue Liner System
This is where your fireplace transformation really takes shape. It involves the heavy lifting (literally!) and ensuring your insert connects properly to your chimney.
Fitting the Insert
Carefully slide the fireplace insert into the opening. This can be tricky due to its weight. You might need a helper, or some inserts come with leveling legs or wheels to assist with positioning. Ensure it sits squarely and is level. You don’t want a crooked fireplace.
Once positioned, secure the insert according to the manufacturer’s directions. This often involves fastening it to the fireplace walls or hearth using brackets and screws.
Connecting the Flue Liner
This is the most critical part for safety and efficiency. The flue liner creates a direct, sealed path for exhaust gases from the insert up through the chimney. Your insert’s exhaust collar connects to this liner.
- Attach the flexible stainless steel liner to the insert’s flue collar. Use appropriate clamps and high-temperature sealant.
- From the roof, feed the liner down the chimney. This is usually a two-person job: one guiding the liner from below, one feeding from above.
- Once the liner is through, pull it taut. It shouldn’t have any sags or kinks.
- Attach the top plate, storm collar, and cap assembly to the top of the chimney, ensuring the liner is securely held and sealed at the top.
- At the bottom, a boot or adapter will connect the liner to the insert. Again, use sealant and clamps for a tight, leak-proof connection.
We’ve found that proper sealing here is paramount. Any leaks can allow smoke or carbon monoxide into your home. Think of it as creating an airtight vacuum cleaner hose that goes all the way up and out.
Insulating the Flue Liner (Optional but Recommended)
For even better performance, consider insulating your flue liner. This helps keep the flue gases hot, which improves draft and reduces creosote buildup. It’s like putting a coat on your chimney’s exhaust system, ensuring it works its best.
Many guidelines suggest that a well-insulated flue liner also helps prevent condensation within the chimney, prolonging its life (National Institute of Standards and Technology).
Final Checks and Testing
You’re almost done! But before you relax by your new fire, a few crucial checks are necessary. Don’t skip these steps; they ensure your hard work results in a safe and efficient fireplace.
Carbon Monoxide Detector Check
Before any test fire, ensure you have a working carbon monoxide detector installed. Place it in the same room as the fireplace. We can’t stress this enough: carbon monoxide is odorless and deadly. This device is your first line of defense.
The Draft Test
Perform a simple draft test before your first full fire. Light a rolled-up newspaper or a piece of kindling in the firebox. Watch to see if the smoke goes up the chimney. If it billows into the room, you have a draft problem. You might have an obstruction or an improperly sealed connection.
First Fire Protocol
Your first few fires should be small. Many inserts use high-temperature paint that needs to “cure.” This curing process can produce an odor and some smoke. Ensure good ventilation during these initial firings. Follow your manual’s instructions for the break-in period.
Our research indicates that following these initial curing steps helps the paint last longer and provides the best performance from your new insert.
Maintenance Checklist for Your New Fireplace Insert
To keep your insert running efficiently and safely for years to come, regular maintenance is key. It’s like taking care of your car; a little upkeep goes a long way.
- Inspect the flue liner annually for creosote buildup and damage.
- Check the insert’s seals and gaskets yearly for wear and tear.
- Clean the glass regularly to maintain visibility and efficiency.
- Clear ash from the firebox as needed, but leave a small bed for insulation.
- Have a professional chimney sweep inspect the entire system every year or two.
Conclusion
You’ve seen that installing a fireplace insert is a rewarding project, enhancing your home’s warmth and efficiency. Remember, meticulous preparation and adherence to manufacturer guidelines are essential for both safety and optimal performance. From gathering tools to the final draft test, each step ensures your new insert functions perfectly. By following these steps carefully, you’re not just installing an appliance; you’re creating a more comfortable and energy-efficient living space. Now, it’s time to enjoy the efficiency and ambiance of your updated fireplace.
Frequently Asked Questions
What’s the typical lifespan of a fireplace insert?
Most quality fireplace inserts can last between 10 to 20 years, or even longer, with proper maintenance. Factors like how often you use it, the quality of installation, and regular cleaning significantly impact its longevity. Think of it as an investment that pays off over many years.
Can I install a fireplace insert myself, or should I hire a professional?
While this guide provides detailed steps, installing a fireplace insert involves significant structural considerations and safety protocols. We recommend that if you lack extensive DIY experience, especially with chimney work, hiring a certified professional is a safer choice. They ensure everything meets local building codes and safety standards.
How can I tell if my existing fireplace is suitable for an insert?
Your fireplace should be structurally sound and free of existing damage. You’ll also need proper clearance to combustible materials. A professional chimney sweep or installer can perform a thorough inspection to confirm compatibility and identify any necessary repairs or modifications.
Do fireplace inserts require a specific type of chimney liner?
Yes, most fireplace inserts require a stainless steel flue liner that runs the entire length of the chimney. This liner creates a dedicated, sealed exhaust path for the insert, which is crucial for efficiency and prevents smoke or carbon monoxide leaks. It’s usually a separate purchase.
What are the signs that my fireplace insert needs maintenance or repair?
Look for decreased efficiency, excessive smoke in the room, unusual odors, or visible damage to seals or gaskets. A buildup of creosote in the flue is also a clear sign. Regular annual inspections help catch these issues before they become serious safety concerns.