How to Set Up a Tent Stove?
On this page (7 sections)
Setting up a tent stove might seem daunting, but it’s quite straightforward with a little guidance. You can easily set up your tent stove by first finding a level, non-flammable spot away from tent walls and gear, then assembling the stove, and finally connecting the chimney pipe securely. Proper setup is key for safe and efficient heating in your shelter.
Many campers and winter enthusiasts rely on tent stoves or a propane tent heater for warmth. Research shows that a well-maintained and correctly assembled tent stove can transform a chilly canvas shelter into a cozy haven. We’ve found that understanding the basic assembly and safety checks is the most important part of enjoying your stove.
- Find a safe spot for your stove.
- Assemble the stove parts correctly.
- Connect the chimney securely.
- Perform a final safety check.
- Ensure good ventilation.
Ready to get your cozy campsite heating system up and running? Let’s walk through exactly how to set up your tent stove, step by step, to ensure warmth and safety on your next adventure with the right cold-weather tent stove.
Setting Up Your Tent Stove for Warmth and Safety
You’ve got your tent, your sleeping bag, and now, the promise of cozy warmth with a tent stove. Setting one up might seem a bit technical at first. But don’t worry, we’ve got you covered. We found that understanding a few key steps makes all the difference. Getting your stove positioned correctly and the chimney hooked up safely is super important for a good experience.
Choosing the Perfect Spot for Your Stove
Your stove needs a secure home within your tent. Think of it like finding the right spot for a campfire, but indoors. We found that safety starts with a level surface. This prevents your stove from tipping over when it’s hot. Avoid placing it directly on fabric or anything that can easily catch fire. Many tent manufacturers recommend using a non-flammable mat or a layer of dirt or sand if available.
Clearance is Key
This is probably the most critical part of stove setup. You need to keep your stove and its chimney pipe away from tent walls and any flammable materials. We found that tent manufacturers often provide specific clearance guidelines. Generally, you’ll want at least 18 to 36 inches of space all around the stove and chimney. Check whether a regular tent can accommodate a stove before setting up. This helps prevent accidental fires. Always check your tent and stove manuals for precise measurements.
Ventilation Matters
Proper airflow is non-negotiable when using a tent stove. It ensures that dangerous carbon monoxide gas escapes your tent. We found that even with a properly functioning chimney, some fresh air intake is essential. A small gap at the bottom of your tent door or a slightly open vent can make a big difference. Many experts say inadequate ventilation is a major safety hazard. Never seal your tent up completely when the stove is in use.
Assembling Your Tent Stove
Most modern tent stoves come in pieces that need to be assembled. This usually involves attaching the legs, the door, and sometimes the flue collar. We found that taking a few minutes to lay out all the parts before you start is a good idea. Make sure you have all the components listed in your stove’s manual. Some stoves have internal baffles or grates that need to be placed correctly for efficient burning.
Attaching the Legs
The legs are what keep your stove elevated and stable. They typically screw or bolt into the bottom of the stove body. Ensure they are tightened securely. Wobbly legs are a recipe for disaster. We found that it’s best to attach the legs while the stove is cool and easy to handle. If your stove has adjustable legs, make sure they are set to the same height on all sides to achieve that level surface we talked about earlier.
Installing the Door and Lid
The door is your access point for fuel and ash. Make sure it seals well when closed to prevent smoke from escaping into your tent. We found that many stove doors have a latch mechanism that needs to be engaged properly. The lid on top is where your chimney pipe will connect. Ensure the lid is seated correctly and secured, if necessary, according to your stove’s design.
Connecting the Chimney Pipe
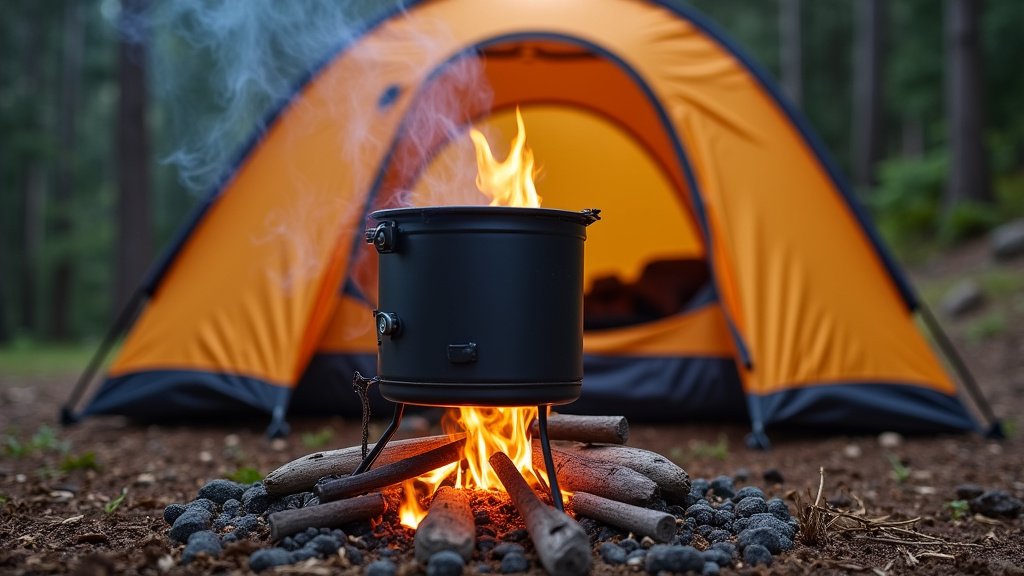
This is where things get serious – the chimney carries the smoke and heat out of your tent. It’s usually a multi-piece system. You’ll have straight sections and possibly some elbow pieces to navigate around tent poles or other obstructions. We found that ensuring a tight seal between pipe sections is vital. Any gaps here can let smoke and dangerous gases back into your living space.
The Flue Collar and First Section
The first section of pipe connects to the flue collar on your stove’s lid. This connection needs to be very secure. Some collars have locking mechanisms, while others might require a small screw or clamp. We found that the fit should be snug, with no room for smoke to leak out. Imagine a handshake – firm and secure!
Joining Pipe Sections
Chimney pipes are typically designed to nest inside each other, like a telescope. The wider end of one pipe slides into the narrower end of the next. We found that it’s important to have these connections overlapping in the correct direction to prevent creosote buildup and leaks. The rule of thumb is that the upper pipe should overlap the lower pipe. This allows rain to run off and prevents drafts from blowing smoke back down.
Exiting the Tent Safely
Your chimney pipe needs to exit your tent through a designated stove jack. This is usually a reinforced opening in the tent fabric with a heat-resistant material. We found that it’s crucial to ensure the chimney pipe is centered within the stove jack and that there’s adequate clearance between the pipe and the tent fabric. Many stove jacks have a rain cap or collar that seals around the pipe. Make sure this is properly installed.
Using a Rain Cap and Spark Arrestor
A rain cap sits on top of the final chimney section. It prevents rain and snow from falling into your stove. A spark arrestor, often a mesh screen, can be added to the top. It helps prevent embers from escaping your chimney and potentially igniting flammable materials outside your tent. We found that these accessories are often sold separately but are highly recommended for safe operation.
Final Safety Checks Before Firing It Up
You’re almost there! Before you light that first fire, a thorough check is a must. Think of it as a pre-flight check for your cozy mobile home. We found that taking just a few extra minutes now can save you a lot of trouble later.
The Wobble Test
Gently try to wiggle your assembled stove. Does it feel solid? Are the legs firmly planted? Does the chimney pipe stand up straight without excessive swaying? If anything feels loose, tighten it up. Stability is your first line of defense against accidents.
Smoke Leak Inspection
With the stove completely cool, visually inspect every connection point of your chimney pipe. Look for any gaps or misalignments. We found that even small gaps can become sources of smoke leakage once the stove is heated and expanding. Make sure the chimney is properly seated in the stove jack.
Clearance Confirmation
Do one last sweep of the area around your stove and chimney. Are there any sleeping bags, clothing, fuel bottles, or other items too close? Double-check those distances against your tent and stove manufacturer’s recommendations. We found that it’s easy to accidentally place something too close when you’re busy setting up camp.
Ventilation Access Check
Ensure you have a clear pathway for fresh air to enter your tent. Is your tent door partially open, or are your vents unobstructed? Good airflow is key to preventing carbon monoxide buildup. Many safety organizations, like the CDC, strongly advise ensuring constant ventilation when using fuel-burning appliances indoors (CDC).
Here’s a quick checklist to run through:
- Stove is on a level, stable surface.
- Sufficient clearance around stove and chimney.
- Chimney sections are securely connected.
- Chimney exits tent properly through stove jack.
- No flammable items are too close to the stove.
- Ventilation points are open and clear.
Conclusion
You’ve now learned the essential steps to safely and effectively set up your tent stove. Remember that a stable, level spot, ample clearance from tent walls, and secure chimney connections are your top priorities. Proper ventilation is also non-negotiable for safety. By following these guidelines, you’ve equipped yourself to enjoy the comforting warmth your tent stove provides, transforming any cold outdoor trip into a cozy experience. Your next step is to practice this setup in a controlled environment before your adventure.
Frequently Asked Questions
What kind of surface should I put my tent stove on?
You need a level and non-flammable surface. Many tent stove manufacturers recommend using a specialized heat-resistant mat or creating a barrier with dirt or sand. This prevents your stove from tipping and protects your tent floor from heat damage.
How much space do I really need between the stove and my tent fabric?
This varies by tent and stove model, but a general guideline is 18 to 36 inches of clearance. Always consult your tent and stove manuals for the manufacturer’s specific recommendations. This space is vital to prevent the tent fabric from reaching its ignition temperature.
Is it really that important to have the chimney pipe sections overlapping correctly?
Yes, it’s extremely important. The wider end of one pipe section should fit over the narrower end of the section below it. This ensures that rain runs off and, more critically, that smoke and creosote are directed outward, not leaking back into your tent.
My tent doesn’t have a designated stove jack. What should I do?
If your tent lacks a pre-made stove jack, you’ll need to create one safely. This typically involves cutting a reinforced opening in the tent fabric and installing a heat-resistant stove pipe collar. If you’re unsure, consider purchasing a tent designed for stove use or consulting with experienced campers.
What’s the risk of carbon monoxide poisoning with a tent stove?
Carbon monoxide is a colorless, odorless gas produced by burning fuel. It’s a serious risk in enclosed spaces like tents. Proper ventilation, ensuring fresh air can enter and exhaust gases can leave through the chimney, is the only way to mitigate this danger.