
How to Replace Wood Stove Glass?
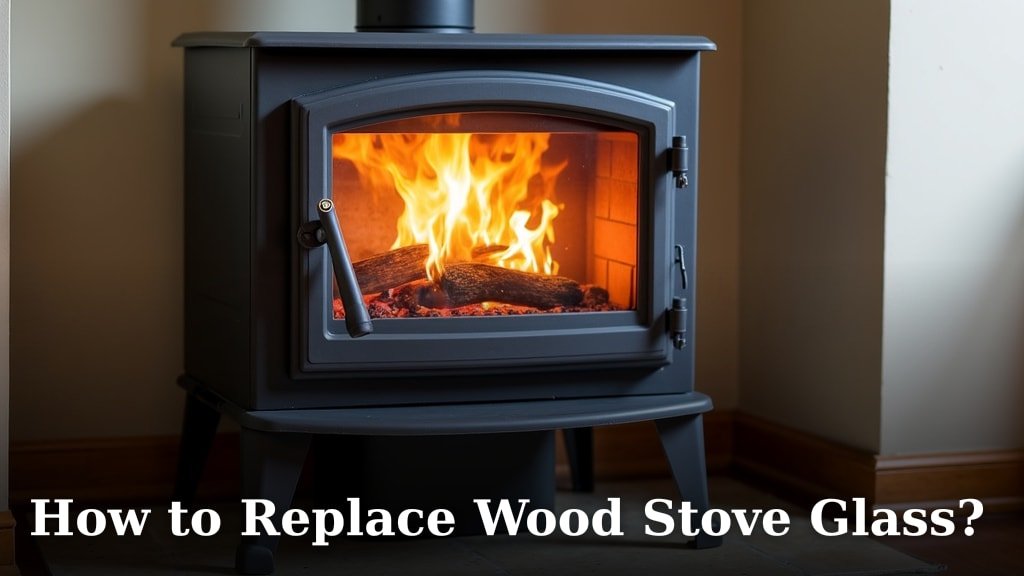
To replace wood stove glass, you’ll need to carefully remove the old pane, clean the door frame, and then install the new glass with the proper gasket material. It’s a DIY project many homeowners can tackle with the right tools and a little patience.
Cracked or broken wood stove glass isn’t just an eyesore; it’s a safety concern that compromises your stove’s efficiency. Replacing it yourself can save you money compared to calling a professional, and you’ll find it’s a manageable task when you know the steps. We’ll guide you through each part of the process.
- Gather your tools and safety gear.
- Carefully remove the damaged glass.
- Clean the door and gasket channel.
- Install new glass with a fresh gasket.
- Test for a proper seal before use.
Ready to get your wood stove looking and working like new again? Let’s walk through exactly how to replace that wood stove glass, step by step.
Getting Started: Your Essential Tool Kit for Glass Replacement
Before you dive into replacing your wood stove glass, gathering the right tools is key. Having everything at hand will make the process smooth and hassle-free.
Think of it like preparing for a cooking project; you wouldn’t start without all your ingredients, right? The same goes for this DIY task.
Safety First: Protecting Yourself During the Repair
Your safety is paramount. Working with broken glass and a heavy stove door requires some precautions.
You’ll want to protect your hands and eyes above all else. This isn’t the time to skimp on safety gear.
Personal Protective Equipment (PPE) Essentials
We’ve found that sturdy gloves and eye protection are your best friends here. You never know when a stray shard of glass might fly.
- Heavy-duty work gloves: Leather or thick fabric gloves are ideal to prevent cuts.
- Safety glasses or goggles: Protect your eyes from glass fragments and dust.
- Dust mask (optional but recommended): Especially if you’ll be cleaning out a lot of soot or old gasket material.
It’s always better to be over-prepared than under-prepared. A small cut can quickly turn a simple job into a trip to urgent care.
Tools You’ll Need for the Job
You probably have many of these items already. No need for highly specialized equipment.
The goal is efficiency and safety, so let’s check your toolkit.
| Tool/Material | Purpose |
|---|---|
| New Wood Stove Glass | The main replacement part. Ensure it’s high-temperature ceramic glass, not regular window glass. |
| Gasket Material | Usually a flat or round high-temp rope for sealing the new glass. |
| Gasket Cement/Adhesive | To secure the gasket in place. |
| Screwdrivers (Phillips/Flathead) | For removing retaining clips or screws holding the glass. |
| Utility Knife or Scraper | To remove old gasket material and adhesive. |
| Wire Brush | For thoroughly cleaning the door frame. |
| Vacuum Cleaner (Shop-Vac recommended) | To clean up dust and debris. |
| Glass Cleaner & Rags | For a final clean of the new glass and door. |
| Marker/Pencil (optional) | To mark the position of clips if needed. |
Having all these items ready saves you from stopping mid-project. A little preparation goes a long way.
Sourcing the Right Replacement Glass and Gasket
Choosing the correct glass and gasket material is crucial for both safety and your stove’s efficiency. You can’t just use any glass.
Think of it like choosing the right tires for your car; mismatched parts can cause problems down the road.
Understanding Wood Stove Glass: Not All Glass is Created Equal
Regular window glass cannot withstand the extreme temperatures inside a wood stove. It would shatter instantly.
You need a special type of glass for this application. We found that this is a common misunderstanding among DIYers.
Ceramic Glass: Your Only Option
The glass used in wood stoves is actually a ceramic material, designed to handle temperatures up to 1400°F (760°C) (Schott AG, a leading manufacturer). It’s incredibly heat-resistant.
This ceramic glass is sold under various brand names like Neoceram, Pyroceram, or Robax. Always confirm it’s rated for wood stove use.
Measure your old glass precisely. Length, width, and thickness are all important. A slight difference can cause fit issues or even breakage.
Selecting the Correct Gasket Material
The gasket creates a tight seal around the glass, preventing smoke leaks and ensuring your stove burns efficiently. It’s often overlooked but incredibly important.
Without a proper seal, your stove could draw too much air, burning fuel too quickly, or even leak carbon monoxide. (National Fire Protection Association guidelines emphasize proper sealing). A proper seal also prevents issues like those that arise when you burn wet wood in a wood stove.
Types of Gaskets and How to Measure
Wood stove glass gaskets are typically made of fiberglass and come in different profiles: flat or round.
- Flat gaskets: Often used for the glass itself, creating a seal against the door frame.
- Round gaskets: More commonly used for the main door seal, but sometimes also for glass.
To measure, you’ll need the width and thickness of the old gasket. If it’s missing, measure the channel in the door where it sits. Many manufacturers specify the gasket size in your stove’s manual.
You’ll also need enough length. Measure the perimeter of the glass opening and add a few extra inches for good measure.
Step-by-Step: Removing the Old Glass and Preparing the Door
This is where the hands-on work begins. Take your time, especially when dealing with broken glass.
Rushing can lead to injuries or further damage to your stove door.
Carefully Extracting the Damaged Glass
Put on your safety glasses and gloves. This step requires your full attention.
Even small fragments can cause nicks and cuts.
Most wood stove glass is held in place by metal clips or retainers, often secured with screws.
Use your screwdriver to carefully loosen and remove these clips. Keep them organized; you’ll need them for the new glass.
Once the clips are off, the glass should be loose. Gently remove any large pieces. For shattered glass, you might need pliers to pull out stubborn bits.
Place all broken glass directly into a sturdy container for safe disposal, like a cardboard box. Don’t just toss it in the regular trash bag.
Cleaning the Door Frame and Gasket Channel
This is a crucial step that many people overlook. A clean surface ensures a good seal for your new gasket.
Imagine trying to stick a bandage on a dirty wound; it just won’t adhere properly.
Use your utility knife or scraper to remove all traces of the old gasket and any dried adhesive. Scrape away carefully, trying not to scratch the door frame itself.
After scraping, use a wire brush to scrub the gasket channel and surrounding areas. This helps remove any stubborn residue or rust.
Finally, use your shop-vac or vacuum cleaner to remove all loose debris, dust, and soot. The channel should be perfectly clean and smooth before proceeding.
A clean channel is absolutely vital for a proper seal. Take your time here.
Installing Your New Wood Stove Glass and Gasket
You’re on the home stretch! This is where you get to see your stove door looking new again.
Proper installation ensures efficiency and prevents air leaks.
Applying the New Gasket Material
Your new gasket needs to be installed correctly to create that essential airtight seal.
Many gaskets come with a self-adhesive backing, but you might also need gasket cement.
If your gasket requires cement, apply a thin bead evenly along the clean channel in the door frame. Don’t overdo it; a little goes a long way.
Starting at the top center, press the new gasket firmly into the channel, working your way around the perimeter.
When you reach the starting point, cut the gasket so the ends meet cleanly, but do not overlap. Overlapping can create a weak spot in the seal.
Allow the gasket cement to set for a few minutes, according to the product’s instructions, before placing the glass.
Securing the New Ceramic Glass
Handle the new glass with care. It’s strong against heat but can still break if dropped or mishandled.
Make sure it’s clean and free of fingerprints before installation. A quick wipe with glass cleaner is usually enough.
Carefully place the new ceramic glass pane into the opening, centering it over the gasket.
Then, re-install the retaining clips or screws that you removed earlier. Do not overtighten these!
Overtightening the clips can crack the glass as it expands and contracts with heat. Snug is good; tight is bad.
The glass should be held firmly but should still have a tiny bit of “play” or give. Many experts recommend tightening until the glass is secure, then backing off a quarter turn. This allows for thermal expansion without stress (Hearth, Patio & Barbecue Association guidelines).
Final Checks and Curing Your New Gasket
You’re almost done! But before you load up your stove and light a roaring fire, there are a couple of important final steps.
These checks ensure your hard work pays off with a safe and efficient stove.
The Dollar Bill Test: Checking Your Seal
This simple test helps you check if your gasket has a good seal around the glass.
It’s a quick way to spot any potential air leaks.
Open your stove door. Place a dollar bill (or a piece of paper) between the door frame and the new glass gasket.
Close the door, clamping the bill in place. Try to pull the bill out.
If you feel resistance, the seal is good. If the bill slides out easily, you might have an air leak in that spot.
Repeat this test around the entire perimeter of the glass. If you find loose spots, you might need to adjust the clips or check the gasket installation again.
Curing the Gasket: Essential Before Full Use
The gasket cement needs time and heat to properly cure and bond. Skipping this can shorten your gasket’s lifespan.
Many manufacturers recommend a specific curing process. We found that following these instructions is key.
Light a small, low-temperature fire in your wood stove. Don’t go for a roaring blaze right away.
Keep the fire small for the first hour or two. This allows the cement to slowly heat up and cure.
Gradually increase the fire’s intensity over the next few hours, or as recommended by the gasket cement instructions.
It’s like breaking in a new pair of shoes; you start slow before running a marathon.
Avoid very hot fires for the first 24 hours if possible. This slow cure ensures a long-lasting, effective seal.
Checklist for a Successful Wood Stove Glass Replacement
- Did you use ceramic glass, not regular glass?
- Is the new gasket properly seated and sealed?
- Are the retaining clips snug but not overtightened?
- Did you perform the dollar bill test around the glass?
- Have you cured the gasket with a small initial fire?
By following these steps, you’ve successfully replaced your wood stove glass. Enjoy the warmth and peace of mind!
Conclusion
Replacing your wood stove glass might seem daunting at first, but as we’ve walked through, it’s a very manageable DIY project. You’ve learned about the critical importance of using ceramic glass, how to properly remove the old pane, and the correct steps for installing a new gasket and glass for an airtight seal.
By following these instructions carefully, you’re not just fixing a broken window; you’re restoring your stove’s efficiency and, most importantly, its safety. With your tools ready and these tips in mind, you’re all set to enjoy the cozy warmth of a fully functional and safe wood stove once again. Go ahead, tackle this project with confidence!
Frequently Asked Questions
How often should wood stove glass be replaced?
You should only replace wood stove glass when it’s cracked, chipped, or broken. Unlike gaskets which degrade over time, the ceramic glass itself is very durable. Regular cleaning and careful handling can help prolong its life.
Can I use high-temperature silicone instead of a gasket for the glass?
No, we found that high-temperature silicone alone is not a suitable replacement for a proper wood stove glass gasket. Gaskets are designed to create a flexible, air-tight seal that also allows for thermal expansion. Silicone might not provide the necessary flexibility or sealing integrity for continuous high heat.
Why is my new wood stove glass cracking after replacement?
New wood stove glass often cracks due to overtightening the retaining clips or screws. This prevents the glass from expanding and contracting with heat, leading to stress fractures. Always ensure the clips are snug but allow for a tiny bit of “give.”
Where can I buy replacement wood stove glass and gaskets?
You can typically purchase replacement wood stove glass and gaskets from stove dealerships, hearth and patio stores, or online retailers specializing in stove parts. Many manufacturers also sell direct replacements. Make sure to have your stove’s model number and precise measurements ready.
Is it normal for a new gasket to smoke a little during the first burn?
Yes, it’s quite normal for a new gasket to emit a slight odor or a small amount of smoke during the initial curing process. This is the gasket cement or bonding agents burning off. Ensure good ventilation during this first small burn, and it should subside quickly.