How to Replace a Wood Stove Gasket?
On this page (8 sections)
- Giving Your Wood Stove a New Seal of Approval
- Why Your Wood Stove Needs a Fresh Gasket
- Gathering Your Wood Stove Gasket Replacement Supplies
- Step-by-Step Guide to Replacing Your Wood Stove Gasket
- Troubleshooting Common Gasket Issues
- Maintenance Checklist for Your Wood Stove Gasket
- Conclusion
- Frequently Asked Questions
Replacing your wood stove gasket is a straightforward DIY task. A new gasket will create a tight seal, improving your stove’s efficiency. You can do this yourself with a few basic tools and materials. It’s often a much simpler fix than you might think!
A worn-out gasket means air can leak into your stove. This makes it hard to control the burn. You might see smoke coming out where it shouldn’t. Replacing it ensures your stove runs safely and burns wood more effectively. Many homeowners find this a cost-effective maintenance step.
- Check your wood stove’s door.
- Look for loose or damaged gasket material.
- A new gasket improves stove efficiency.
- It helps prevent smoke leaks.
- This is usually a simple DIY repair.
Ready to get your wood stove sealing like new again? Let’s walk through how to replace that old gasket step by step.
Giving Your Wood Stove a New Seal of Approval
Replacing the gasket on your wood stove is a smart maintenance task. It’s one of the most effective ways to improve how your stove performs. A worn-out gasket can lead to air leaks. These leaks make it tough to control your fire. You might notice smoke escaping or a fire that burns too quickly. A new gasket creates a tight seal. This seal helps your stove operate safely and efficiently.
Why Your Wood Stove Needs a Fresh Gasket
Think of your wood stove’s gasket like the seal on a jar. It keeps everything contained. When it’s fresh and intact, it does a great job. It prevents air from rushing in where it’s not supposed to. This controlled airflow is key to managing your fire. It allows you to get the most heat from your wood. It also helps keep smoke contained within the firebox. A damaged gasket can cause several problems. You might have a fire that burns too hot and fast. This wastes fuel. You could also have smoke leaking into your room. This is not only unpleasant but also a safety concern.
Signs Your Gasket is Past Its Prime
How do you know it’s time for a new gasket? There are a few tell-tale signs. The most obvious is if you can see visible damage to the old gasket. This could be fraying, cracking, or areas where it’s completely missing. Another test is the dollar bill test. Close the stove door with a dollar bill or a piece of paper held between the door and the stove body. If you can easily pull the bill out, the seal isn’t tight enough. You should feel some resistance. If the paper slides out with no effort, it’s a strong indicator that your gasket needs replacing. You might also notice that your stove is difficult to control. It might burn hotter than usual, even with the air intake closed down. Smoke curling out of the door seam is another red flag.
The Benefits of a Properly Sealed Stove
When your gasket is in good shape, your wood stove works better. You’ll get more heat from less wood. This means fewer trips to the woodpile. Controlling the burn becomes much easier. You can adjust the air intake to achieve a slow, steady burn. This maximizes the efficiency of your fuel. Safety is also a big plus. A tight seal keeps smoke and dangerous carbon monoxide gases where they belong – inside the stove. This protects your home and family. Many homeowners find that replacing the gasket is a cost-effective repair that pays for itself in fuel savings alone.
Gathering Your Wood Stove Gasket Replacement Supplies
Before you start, let’s make sure you have everything you need. This is a DIY project that doesn’t require a lot of fancy tools. Most of what you’ll need is readily available at hardware stores.
Essential Tools and Materials
You’ll need a few key items. First, you’ll need your replacement gasket kit. These come in different materials and sizes. Fiberglass is a common and durable choice. We’ll talk more about choosing the right one later. You’ll also need a fiberglass gasket tape or rope. This is what you’ll use to seal the new gasket in place. A utility knife or a sharp pair of scissors is essential for cutting the gasket material to size. You might also need a wire brush or a putty knife. These are helpful for cleaning away old gasket material and adhesive. Lastly, have a measuring tape handy. Getting the right length of gasket is important.
Choosing the Right Gasket for Your Stove
Wood stove gaskets aren’t one-size-fits-all. They are typically made from fiberglass or ceramic fiber. Fiberglass is the most common. It’s durable and easy to work with. Ceramic fiber is also an option, often used for very high-temperature applications. The shape of the gasket is important too. Most stoves use a flat tape gasket. Some might use a round rope-style gasket. Check your stove’s manual if you’re unsure. The width of the gasket is also critical. You need a gasket that is wide enough to fill the gap but not so thick that the door won’t close properly. Many manufacturers offer specific gasket kits for their stove models. This is often the easiest way to ensure you get the correct size and type.
Step-by-Step Guide to Replacing Your Wood Stove Gasket
Now that you have your supplies, let’s get to work. This process is typically straightforward. Taking your time will ensure a good result.
Step 1: Prepare Your Work Area and Stove
First, make sure your stove is completely cool. Never attempt to replace a gasket on a hot stove. This is a fire safety rule. Open the stove door and lay down some newspaper or a drop cloth on the floor in front of the stove. This will catch any dust or debris. You might want to wear gloves and eye protection, especially when cleaning off the old gasket. Old gasket material can be brittle and dusty.
Step 2: Remove the Old Gasket Material
Open the stove door fully. You’ll see the old gasket seated in a groove around the door or the stove body. Use your utility knife or putty knife to carefully scrape away the old gasket material. A wire brush can be helpful for removing any stubborn bits or residue. You want to get the channel as clean as possible. This ensures the new gasket will adhere properly. Be patient here. Getting the channel clean is crucial for a good seal.
Step 3: Clean the Gasket Channel
Once the bulk of the old gasket is removed, it’s time for a thorough cleaning. Use your wire brush to scrub the channel where the gasket sits. You want to remove all traces of old adhesive, soot, and debris. A vacuum cleaner with a crevice tool can also be useful for sucking out loose dust. For tough residue, a little bit of mineral spirits on a cloth can help. Just be sure to let it evaporate completely before proceeding. A clean surface is essential for the new gasket to stick well. Many stove manufacturers recommend a clean, dry surface.
Step 4: Measure and Cut the New Gasket
Now, measure the length of the gasket channel around your stove door. It’s often best to measure each side separately if you’re not using a continuous piece. Carefully cut your new gasket material to the required length using your utility knife or scissors. It’s better to cut it a little too long than too short. You can always trim it down if needed. Double-check your measurements before making the cut. You want the gasket to fit snugly without being stretched too much.
Step 5: Apply the New Gasket and Adhesive
Most gasket kits come with high-temperature adhesive. Apply a thin, even bead of adhesive into the clean gasket channel. Some people prefer to apply the adhesive directly to the gasket itself. Follow the instructions that came with your specific gasket and adhesive. Carefully press the new gasket into the channel, starting at one point and working your way around. Ensure it is seated firmly and evenly. If you cut your gasket in sections, make sure the ends meet cleanly. You want a continuous, unbroken seal.
Step 6: Secure the Gasket and Test the Door
Once the gasket is in place, you may need to hold it there for a few minutes to allow the adhesive to set. Some people use masking tape to hold the gasket in position while the adhesive cures, especially around corners. Allow the adhesive to cure fully according to the manufacturer’s instructions. This usually takes at least 12-24 hours. Do not close the stove door firmly during this time. Once the adhesive is fully cured, test the door. Close it gently and perform the dollar bill test again. You should feel a firm, consistent resistance all the way around. If the door feels too tight, you might need to slightly trim a section of the gasket. However, it’s generally better for it to be a little snug than too loose.
Step 7: Cure the New Gasket
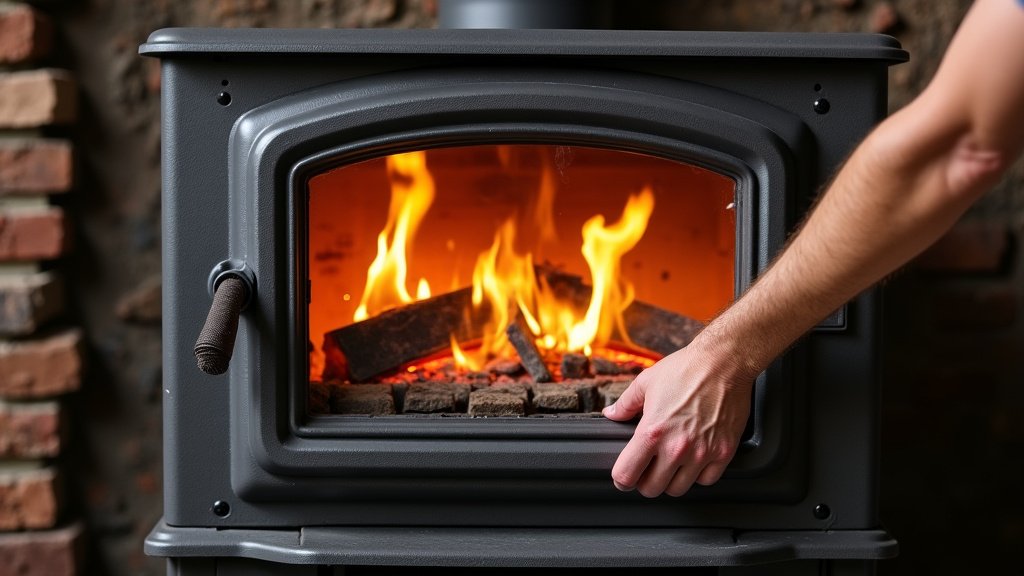
After installing the new gasket, it’s a good idea to “cure” it. This involves building a small, low fire in your stove. Let the fire burn for about an hour. This helps the gasket fully set and bond. Avoid building a large, hot fire immediately. Do this for a couple of cycles. This process ensures the gasket will withstand regular use and high temperatures. Many experts recommend this curing step.
Troubleshooting Common Gasket Issues
Even with careful work, you might run into a snag. Here are a few common problems and how to fix them.
The Door Still Isn’t Sealing Properly
If the dollar bill test still shows a leak, double-check your work. Is the gasket seated correctly in the channel? Did you miss a spot when cleaning? Sometimes, the issue isn’t the gasket itself but the door hinges. If the hinges are loose or worn, the door might not be pressing against the stove body evenly. Tightening or replacing hinges can solve this. Also, check if the door latch is adjusted correctly. It might need to be tightened to pull the door closer.
The Gasket Seems Too Thick
If the door is difficult to close or feels like it’s straining, the gasket might be too thick for the channel. If you’ve followed the recommended gasket size, this is unusual. You may need to carefully trim a small amount of the gasket material along the length. Do this in very small increments. You can always remove more, but you can’t add it back. Be cautious not to over-trim, as this will compromise the seal. It’s often better to use a slightly thinner gasket if possible.
Adhesive Isn’t Holding
If the gasket is coming loose, the adhesive might not have been applied correctly. Ensure the channel was completely clean and dry before applying the adhesive. You might need to remove the gasket, clean the channel again, and reapply the adhesive. Make sure you are using a high-temperature adhesive specifically designed for wood stoves. Read and follow the adhesive manufacturer’s instructions carefully. Some adhesives require specific drying or curing times. Using the wrong adhesive can lead to premature failure.
Maintenance Checklist for Your Wood Stove Gasket
To keep your wood stove running efficiently, a little regular care goes a long way. Follow this simple checklist:
- Inspect your gasket visually at the start of each heating season.
- Perform the dollar bill test every few months to check for leaks.
- Clean the gasket channel thoroughly when replacing the gasket.
- Use only high-temperature adhesive recommended for wood stoves.
- Allow the gasket and adhesive to cure completely before use.
- Address any signs of wear or damage promptly.
Conclusion
You’ve now learned how to give your wood stove a fresh seal of approval. Replacing your gasket is a straightforward task. It’s a key step in ensuring your stove operates safely and efficiently. By following these steps, you’ll notice improved heat output and better control over your fires. Don’t wait for minor issues to become major problems. Your next step is to gather your supplies and schedule a time to perform this simple but essential maintenance.
Frequently Asked Questions
How often should I check or replace my wood stove gasket?
It’s a good idea to visually inspect your gasket at the beginning of each heating season. Perform the dollar bill test every few months. Replace the gasket if you notice visible damage, it fails the dollar bill test, or your stove becomes difficult to control.
Can I use regular adhesive to glue the gasket?
No, you must use a high-temperature adhesive specifically designed for wood stoves and gaskets. Regular adhesives will not withstand the heat and can fail, potentially creating a fire hazard. Always check the product label.
What happens if my wood stove gasket is too thick?
If the gasket is too thick, the door may be difficult to close or might not seal properly. You might need to carefully trim a small amount of the gasket material. It’s better to have a gasket that’s slightly snug than too loose to ensure a good seal.
My new gasket seems to be coming loose. What should I do?
Ensure the gasket channel was perfectly clean and dry before you applied the adhesive. If it’s still coming loose, you may need to remove it, clean the channel again thoroughly, and reapply the correct high-temperature adhesive, following manufacturer instructions precisely.
Can I skip the gasket curing fire?
It’s highly recommended not to skip the curing process. Building a small, low fire for about an hour after installation helps the gasket fully set and bond. This ensures it can withstand the high temperatures of regular use without failing.