How to Seal a Wood Stove Door Gasket?
On this page (7 sections)
Yes, sealing a wood stove door gasket is super important for safety and efficiency. A good seal prevents dangerous smoke leaks and stops hot air from escaping. This keeps your home warmer and your wood stove burning cleaner and hotter.
When your wood stove door gasket is worn out, you might notice smoke curling out or that your stove doesn’t hold its heat well. Replacing a faulty gasket is a common and necessary maintenance task. Many homeowners can do this repair themselves with a few simple tools and materials.
- Check your wood stove door gasket regularly.
- A worn gasket leaks smoke and heat.
- Replacing it improves safety and stove performance.
- It’s a DIY-friendly repair project.
Ready to get your wood stove sealing like new again? Let’s walk through exactly how to replace that pesky door gasket step by step.
Maintaining Your Wood Stove Door Seal
Your wood stove door gasket is more than just a rubbery ring. It’s a silent guardian of your home’s warmth. It also ensures your stove burns as efficiently as possible. When this gasket wears out, your cozy fire can turn into a smoky problem. Let’s get your stove sealing tight again.
Why Your Wood Stove Needs a Good Door Seal
Think of your wood stove like a high-performance engine. It needs a tight seal to work its best. This seal is usually a fiberglass rope gasket. It sits in a channel around the stove door. Its main job is to keep hot air inside the firebox. It also stops smoke and other gases from escaping into your room.
Safety First: Preventing Smoke Leaks
A worn gasket can let smoke escape. This is not just annoying; it’s a real safety hazard. Smoke contains carbon monoxide. This is a colorless, odorless gas. It can be very dangerous. Keeping the gasket in good shape is a key step in preventing these dangerous fumes from entering your home. Many safety guidelines stress the importance of a good seal (CDC).
Efficiency Boost: Keeping the Heat In
Your wood stove’s efficiency relies on controlled airflow. A tight gasket prevents uncontrolled air from being sucked into the stove. This “false air” cools the fire down. It makes your wood burn faster. A good seal means more heat stays in the firebox. This lets your wood burn hotter and last longer. You’ll use less wood and get more warmth for your effort.
Understanding Gasket Wear and Tear
Gaskets don’t last forever. They face extreme heat and pressure every time you use your stove. Over time, they can become brittle. They might also get compressed and lose their springiness. Sometimes, ash and creosote can build up. This can damage the gasket. You might notice a few signs that your gasket needs attention.
Signs Your Gasket Needs Replacing
- You can see or feel air leaks around the door.
- The door doesn’t seem to close tightly.
- Smoke or soot streaks appear on the glass or around the door.
- Your stove burns through wood much faster than it used to.
- The old gasket feels hard, brittle, or crumbly.
Gathering Your Supplies for Replacement
Before you start, let’s make sure you have everything you need. Having all your tools and materials ready makes the job much smoother. You don’t want to stop halfway through because you’re missing one small item.
Essential Tools and Materials
You won’t need a lot of fancy equipment for this. Most of these items are likely already in your home. If not, they’re easy to find at your local hardware store.
- New Gasket Kit: This is the most important part. Kits usually come with the correct size fiberglass rope gasket and high-temperature adhesive. Make sure you get the right size for your stove. Check your stove’s manual or measure the old gasket.
- Tape Measure: To confirm the size of your current gasket or the channel.
- Wire Brush or Stiff Bristle Brush: For cleaning out the old gasket material and debris from the door channel.
- Putty Knife or Scraper: To gently remove any stubborn old adhesive or gasket fragments.
- Scissors or Utility Knife: To cut the new gasket to the correct length.
- Gloves: Fiberglass can be itchy. Protect your hands!
- Safety Glasses: To keep dust and debris out of your eyes.
Step-by-Step Guide to Replacing Your Gasket
Now, let’s get down to business. We’ll walk through each step so you can feel confident doing this yourself. It’s a straightforward process, but it requires a bit of patience.
Step 1: Let the Stove Cool Down Completely
This is non-negotiable. Safety first! Never attempt to work on a hot stove. Wait until the stove and all its parts are completely cool to the touch. This usually means waiting at least 12 to 24 hours after the last fire. Working on a cool stove prevents burn injuries.
Step 2: Remove the Old Gasket
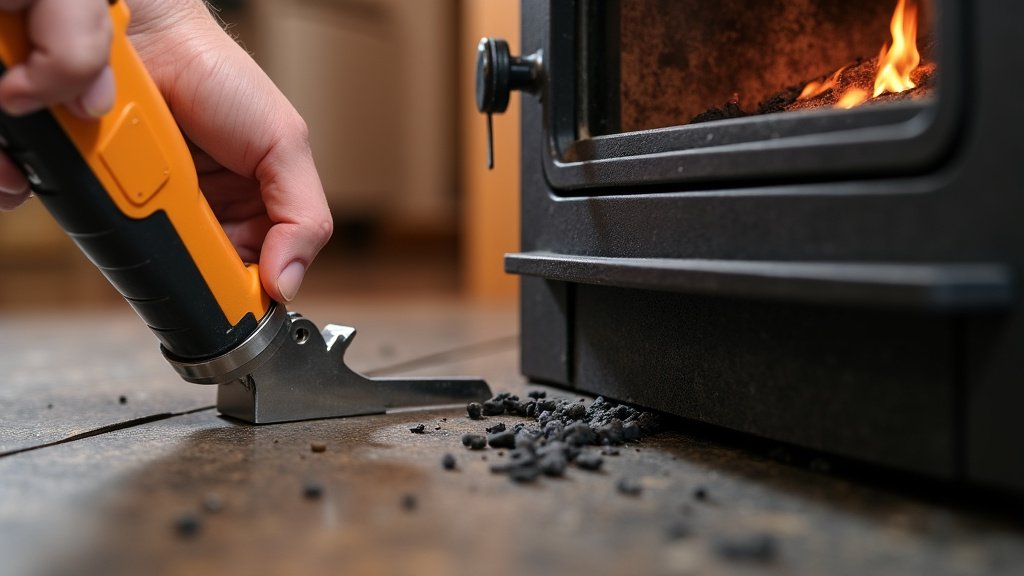
Open the stove door. You’ll see the old gasket in a groove or channel around the inside edge of the door. Use your putty knife or scraper to gently lift the old gasket out. If it’s brittle, it might crumble. That’s okay. Use your wire brush to clean out the channel. You want to remove all traces of the old gasket material and any old adhesive. Get the channel as clean as possible. A clean surface helps the new adhesive stick better. You might find some stubborn bits. Work patiently to remove them without damaging the metal channel.
Step 3: Measure and Cut the New Gasket
Once the channel is clean, you’ll need to cut your new gasket. Most gasket kits come with a bit of extra length. It’s better to have too much than too little. Measure the circumference of the channel where the gasket sits. Some people find it easier to wrap the new gasket around the channel loosely first. Then, mark where it overlaps. Cut the gasket to length using sharp scissors or a utility knife. Make sure your cut is clean and straight.
Step 4: Apply the Adhesive and Install the New Gasket
Your gasket kit should come with a specific high-temperature adhesive. Carefully read the instructions on the adhesive tube. Apply a thin, even bead of adhesive into the clean channel. Do not put too much, as it can ooze out later. Some people prefer to apply adhesive to the gasket itself, while others apply it to the channel. The key is to have a continuous line of adhesive. Now, gently press the new gasket into the adhesive. Start at one end and work your way around. Press firmly, especially at the corners and where the ends of the gasket meet. Make sure the gasket sits snugly in the channel without any gaps. You want it to feel secure.
Step 5: Let the Adhesive Cure
This is a critical step that many people rush. The adhesive needs time to cure properly. Check the instructions that came with your adhesive. It usually requires at least 12 to 24 hours to set before you can use the stove. Some adhesives might recommend a slow initial burn. This helps the adhesive fully harden. Skipping this curing time can cause the new gasket to come loose. It can also ruin the adhesive. Patience here will ensure a long-lasting, effective seal.
Step 6: Test the Seal
Once the adhesive has cured, you can test your work. Close the stove door. It should feel snug. You can also try the “dollar bill test.” Close the door on a dollar bill. If you can pull the bill out easily, the seal might not be tight enough. You should feel some resistance. A properly sealed door will make a noticeable difference. You’ll notice less air movement around the door. This is a good sign your repair was successful.
Troubleshooting Common Gasket Issues
Sometimes, even with the best intentions, things don’t go perfectly. Don’t worry if you run into a small snag. We’ve got a few common issues and how to fix them.
Gasket Not Sticking
If your gasket isn’t sticking, the most common cause is a dirty channel. You may need to remove the gasket again. Clean the channel thoroughly with a wire brush. Ensure all old adhesive and debris are gone. Make sure you are using the correct high-temperature adhesive. Some standard glues won’t work here. Reapply the adhesive and press the gasket firmly. Allow adequate curing time.
Door Still Leaks Air
If you’ve replaced the gasket and still feel air leaks, the problem might be deeper. Check the door itself. Is the door warped? Are the hinges bent or misaligned? Sometimes, the metal itself that holds the gasket might be damaged. If the gasket feels loose even after a proper cure, you might need to reapply adhesive or consider if the gasket is the wrong size. If the door itself is the issue, you may need to adjust the hinges or consult a professional. A warped door can prevent even the best gasket from sealing properly.
Gasket Too Thick or Too Thin
Using the wrong thickness gasket can cause problems. A gasket that is too thick will prevent the door from closing properly. This can strain the hinges and the latch. A gasket that is too thin won’t create a tight seal. Always measure your old gasket or the channel before purchasing a new one. Manufacturers often specify the correct gasket size for their stoves. Consulting your owner’s manual is a great way to ensure you get the right fit.
Here’s a quick checklist to ensure you’ve got it covered:
- Cool Stove: Confirm your stove is completely cool.
- Clean Channel: Ensure the gasket channel is spotless.
- Correct Size: Double-check your gasket measurements.
- Proper Adhesive: Use high-temperature adhesive only.
- Curing Time: Allow the adhesive to fully cure.
- Seal Test: Perform a test to check for leaks.
Conclusion
You’ve successfully learned how to seal your wood stove door gasket. This simple DIY project is vital for your home’s safety and your stove’s efficiency. A tight seal means no dangerous smoke leaks and more heat staying where it belongs—inside your firebox. Remember to always let your stove cool completely before starting. Keep the gasket channel clean and use the correct high-temperature adhesive. Patience during the curing process ensures a lasting repair.
Now that you know the steps, go ahead and schedule a time to tackle this maintenance task. Your cozy, safe home will thank you!
Frequently Asked Questions
How often should I check my wood stove door gasket?
It’s a good idea to visually inspect your wood stove door gasket at least once a year, typically before the heating season begins. Look for any signs of wear, brittleness, or damage. A quick check can prevent bigger issues down the line.
Can I use regular household glue instead of high-temperature adhesive?
No, you absolutely should not. Regular glues will not withstand the extreme heat of a wood stove and will fail quickly. Always use a high-temperature adhesive specifically designed for wood stove gaskets to ensure safety and durability.
What happens if I don’t replace a worn-out gasket?
A worn gasket can lead to dangerous carbon monoxide leaks into your home, and it significantly reduces your stove’s heating efficiency. You’ll burn more wood to get less heat, and the risk of smoke entering your living space increases.
My new gasket feels a bit loose after curing. What should I do?
If the gasket feels loose, it might not have adhered properly. Ensure the channel was completely clean before application. You may need to remove the gasket, clean the channel again thoroughly, and reapply the high-temperature adhesive, making sure to press it in firmly and allow sufficient curing time.
How do I know if I bought the right size gasket?
The best way to ensure you have the right size is to measure the channel on your stove door before purchasing. Most manufacturers recommend a specific gasket diameter for their models; checking your stove’s manual is highly recommended. If the gasket is too thick, the door won’t close properly; too thin, and it won’t seal effectively.