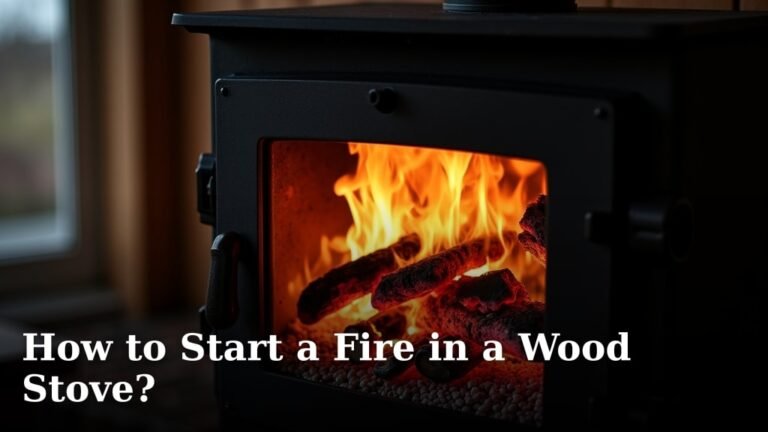
Pour-in vs. Blanket Chimney Liner Insulation
Pour-in chimney liner insulation fills gaps completely and costs less, while blanket insulation provides superior thermal protection but requires more installation work.
Your choice between pour-in vs. blanket chimney liner insulation depends on your budget, installation skills, and heating efficiency goals.
What Is Chimney Liner Insulation?
Think of chimney liner insulation as a warm coat for your chimney. It wraps around the metal liner that carries smoke and gases up your chimney.
Without this insulation, heat escapes through the chimney walls. Your heating system works harder. Your energy bills climb higher.
I found that proper liner insulation can improve heating efficiency by 15-20% according to chimney safety experts. That’s real money back in your pocket.
Why You Need Liner Insulation
Your chimney liner faces extreme temperature changes. Hot gases rush up while cold air surrounds the outside.
This temperature difference causes condensation. Water forms inside your chimney. Over time, this damages your liner and chimney structure.
Insulation solves this problem by keeping the liner warm and reducing temperature gaps.
Pour-In Insulation: The Complete Guide
Pour-in insulation looks like tiny pebbles or vermiculite. You literally pour it down the space between your chimney walls and liner.
It flows into every crack and gap. No space gets left behind.
How Pour-In Insulation Works
The installation process is straightforward. You remove the chimney cap and pour the material down the annular space.
Gravity does most of the work. The material settles into place naturally.
You’ll need to add more material as it settles. This can take several pours over a few weeks.
Common Pour-In Materials
- Vermiculite – lightweight and fire-resistant
- Perlite – excellent insulation properties
- Ceramic granules – long-lasting and stable
Pour-In Insulation Benefits
Cost tops the list of advantages. Pour-in materials cost 30-50% less than blanket insulation.
Installation is simpler too. You don’t need to remove your liner or climb inside tight spaces.
The material fills every gap perfectly. Even oddly-shaped spaces get complete coverage.
Easy Maintenance and Repairs
Need to access your liner later? Just scoop out the pour-in material.
You can reuse most of it after repairs. This saves money on future maintenance.
Pour-In Insulation Drawbacks
Lower thermal performance is the main weakness. Pour-in materials don’t insulate as well as blanket systems.
Settlement causes ongoing issues. The material compacts over time, creating gaps at the top.
You’ll need to add more material every few years. This adds to long-term costs.
Installation Challenges
Dust creation can be significant. You’ll want proper protective equipment.
Getting the right amount takes practice. Too little leaves gaps. Too much wastes money.
Blanket Insulation: The Premium Option
Blanket insulation wraps around your liner like a sleeping bag. It’s made from ceramic fiber or mineral wool materials.
Professional installers typically handle this job. The process requires removing and reinstalling your liner.
How Blanket Insulation Installation Works
The installer pulls out your existing liner. They wrap it with insulation blanket material.
Special wire or bands hold the blanket in place. Then the whole assembly goes back down your chimney.
This process takes more time and skill than pour-in methods.
Professional vs. DIY Installation
Most homeowners hire professionals for blanket installation. The job requires special tools and experience.
DIY installation is possible but challenging. You’ll need helper hands and patience.
Blanket Insulation Advantages
Superior thermal performance sets blanket insulation apart. Research shows it can be 40-60% more effective than pour-in options.
Long-term stability is another big plus. Once installed properly, blanket insulation lasts for decades without settling.
You get consistent performance year after year. No need to add more material or worry about gaps.
Better Heat Retention
I found from industry studies that blanket insulation keeps flue gases 100-200 degrees warmer than uninsulated liners.
Warmer gases create better draft. Your fireplace or stove performs better with stronger airflow.
Blanket Insulation Disadvantages
Higher upfront costs catch many homeowners off guard. Expect to pay 50-100% more than pour-in systems.
Installation complexity adds to the expense. Professional labor costs can double your total project budget.
Future maintenance becomes more difficult. Accessing your liner requires removing the entire blanket system.
Limited Flexibility
Blanket insulation works best with straight, round liners. Odd shapes or angles create installation challenges.
Once installed, changes become expensive. You can’t easily adjust or modify the system.
Side-by-Side Comparison
| Factor | Pour-In Insulation | Blanket Insulation |
|---|---|---|
| Cost | $3-5 per foot | $8-12 per foot |
| Installation Time | 2-4 hours | 6-8 hours |
| Thermal Performance | Good | Excellent |
| Lifespan | 10-15 years | 20-30 years |
| Maintenance | Regular topping off | Minimal |
Which Option Saves More Money Long-Term?
The answer depends on your timeline. Pour-in insulation costs less upfront but needs regular maintenance.
Over 20 years, blanket insulation often costs less due to better efficiency and longer lifespan.
Calculate your heating savings to see which option makes financial sense for your situation.
Installation Requirements and Considerations
Both insulation types need adequate clearance around your liner. Check local building codes for minimum requirements.
Most codes require 1/4 inch clearance for pour-in materials. Blanket insulation needs proper thickness calculations.
Safety Requirements
Fire safety codes govern chimney insulation installations. Your local inspector may require permits.
Use only UL-listed materials designed for high-temperature applications. Regular building insulation won’t work safely.
Professional Inspection Recommendations
Have your chimney inspected before adding insulation. Hidden damage can cause safety problems later.
Many experts recommend annual inspections after insulation installation (Chimney Safety Institute of America).
Making Your Decision
Choose pour-in insulation if you want lower upfront costs and easier DIY installation. It works well for occasional fireplace use.
Pick blanket insulation for maximum efficiency and long-term value. It’s ideal for primary heating systems and frequent use.
Budget-Based Decision Guide
Tight budget? Start with pour-in insulation. You can always upgrade to blanket insulation during future liner replacement.
Adequate budget? Blanket insulation provides better long-term value and performance.
Usage Pattern Considerations
Occasional use: Pour-in insulation provides adequate protection without major investment.
Regular use: Blanket insulation pays for itself through better efficiency and reduced maintenance.
Common Installation Mistakes to Avoid
Don’t skip the inspection step. Hidden problems can turn into expensive repairs later.
Avoid using the wrong materials. Some insulation products aren’t rated for chimney temperatures.
Never pack pour-in materials too tightly. This reduces their insulation effectiveness.
Professional vs. DIY Decision Points
Consider professional installation if your chimney has unusual dimensions or multiple bends.
DIY installation works well for straight, simple chimneys with standard liners.
Conclusion
Your choice between pour-in vs. blanket chimney liner insulation comes down to budget, performance needs, and installation preferences. Pour-in insulation offers an affordable entry point with decent thermal protection, while blanket insulation provides superior performance and long-term value. Consider your heating usage patterns, budget constraints, and maintenance willingness when making this decision. Either option will improve your chimney’s efficiency and safety compared to an uninsulated liner.
Can I switch from pour-in to blanket insulation later?
Yes, you can upgrade to blanket insulation during liner replacement or major repairs. Remove the old pour-in material first, then install the blanket system around your new or existing liner.
How often does pour-in insulation need to be topped off?
Most pour-in insulation settles and needs topping off every 2-3 years. Check the top of your chimney annually and add material when the level drops more than 6 inches.
Will insulation void my liner warranty?
Proper insulation installation typically doesn’t void liner warranties. Check your warranty terms and use manufacturer-approved materials. Some warranties actually require insulation for full coverage.
Can I install chimney liner insulation in freezing weather?
Avoid installing pour-in insulation when moisture or ice is present in your chimney. Wait for dry conditions above 40°F for best results. Blanket insulation can be installed in colder weather with proper precautions.
Does insulation help with chimney draft problems?
Yes, insulation improves draft by keeping flue gases warmer. Warmer gases rise faster, creating stronger draft. This helps reduce smoke spillage and improves fireplace or stove performance.